Sunday, October 28, 2018

VASSAL Tournament Round 3: CommanderDave vs GiledPallaeon

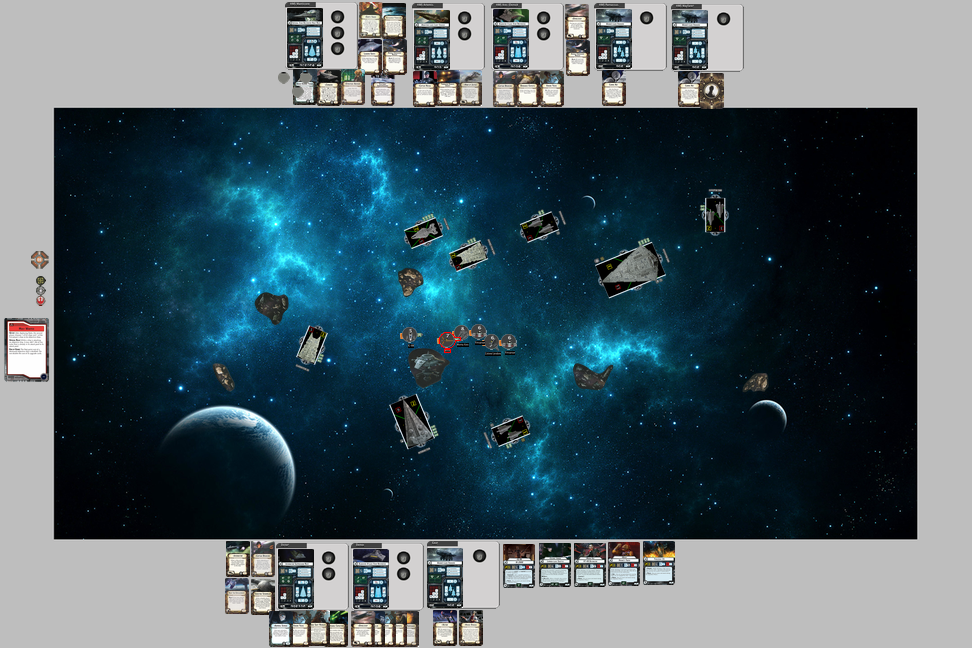
This was the third Vassal Round and also the third time I face off against a Thrawn fleet. The first was squadron heavy, the second a medium squadron ball, and this match was squadronless. GiledPallaeon was my opponent and he ran a Kuat, Demo, TRC Arquittens, and a pair of Gozantis. Thanks to his Strategic Advisor, he was able to wait me out with all three combat ships. Unfortunately, he was short on deployments. He chose my Most Wanted and I made his ISD and my Gozanti the objectives. I was able to place my combat ships on the side opposite his ISD to try to force him to fly through my bomber cloud. Here is the setup:


Round one involved positioning. I set my Demo up to hit his Arq and Giled positioned his Demo as a counter. Ouch. Here is the end of round 1:


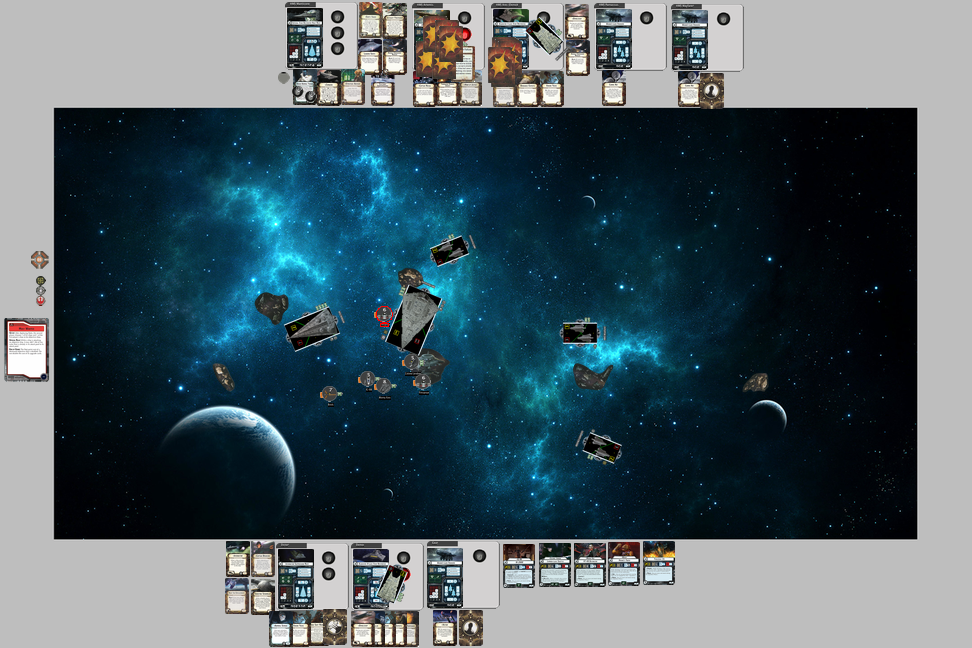
In round two, I hit Giled’s Demo with my Interdictor and squadrons, leaving it on two health. My Demo hit his Arquittens. The end of the round left my Demo softened up considerably. Here is the close of round 2:


Round three was the deciding point. Giled activated his Demo first and finished mine off. I then activated my Dictor and killed the Arquittens with a double arc shot before Engine Tech ramming the opposing Demo to death. I waffled on this move a lot as it let him move his ISD up for a close range activation next round. Unfortunately for him, the ISD ended up with only the side in arc. This was the deciding moment as I knew that he couldn’t kill my Interdictor, even with Darth Vader boarding and eliminating my Targeting Scramblers. Here is the close of round 3:


In round four, I was able to finish the ISD off with my squadrons. Here is the closing board state:


This was another strong victory, but it was a very favorable matchup for my list. I was definitely starting to sweat when he took my Demo down as it increased my risk of being tabled. The decision to ram his Demo was a little risky, but it worked out. Had Giled gotten the double arc from the Kuat ISD, I would have been in grave danger of destruction with the loss of Scramblers, especially if he could generate an accuracy on the front arc shot. Great game, very tense!


Wednesday, October 24, 2018

Thrawn ISD & Demo vs Ackbar AFmkIIs

In preparation for my upcoming Vassal Tournament match against GiledPallaeon, I decided to run my opponent’s list against my usual sparring partner, Andy. The list is fairly intimidating with a Kuat ISD, Demolisher, TRC Arquittens, and a pair of Gozantis for activation padding. The Kuat has the Darth Vader boarding team rather than the BTAvenger combo. It’s a very aggressive list that really benefits from going first.

On the other side, Andy brought a four activation Ackbar list with a pair of AFmkIIs, TRC90, GR75, scatter Aces, and a VCX. His TRC90 had FCTs to make the VCX do double duty with tokens. I chose first player and picked his Advanced Gunnery objective. Thanks to his squadrons, he was able to outdeploy me, so I had to work hard and fast to reposition. Here is the close of round one:


In the second round, I moved the ISD up fast to block the frigates while keeping my other ships out of range. I saved the ISD for last to prevent the double hit from the objective frigate in the rear with the intent of moving first in the next round. This was my main target due to the points bonus. Here is the close of round 2:


In the third round, I lost my Arquittens to the unavoidable double broadside from the objective ship while eliminating the TRC90. My ISD was damaged, but nothing serious and was in just the right spot to put serious pain on the frigates. Here is the close of round 3:


In the fourth round, I delivered the deathblow to the opposing objective ship, but wasn’t quite able to finish the deed on the flagship frigate, which was able to move out of the ISD front arc. Here is the close of round 4:


Round five was uneventful. The side arc shot from the ISD left the frigate limping, but couldn’t finish the task and Demolisher was too far away to move in on round six to finish the job. We called it at the close of round 5:


This was interesting to run an opponent’s list and it helped me to see the strengths and weaknesses of that list. GiledPallaeon’s list benefits from the flexibility of having Thrawn nav dials ready to go. I elected to set all three as navigate and set the ships’ dials to the second most useful command - repair came in very handy. Thanks to the flotillas, my combat ships had no shortage of tokens as well. The damage output was significant from both the ISD and Demo thanks to their Assault Concussion Missiles. Activation advantage was also powerful, as usual. On the flip side, five deployments seems very light. I had to commit my two heavy hitters before Andy placed his two frigates. This resulted in a less than optimal starting position.


Friday, October 12, 2018

VASSAL Tournament Round 2: CommanderDave vs Thrindal

Round two of the Vassal Tournament pitted my Screed list against another Thrawn list. This one was very different from the previous Thrawn matchup. My opponent, Thrindal, had a BT Avenger type ISD with Rapid Launch Bays. In the bays, he had Rhymer, a pair of Firesprays, and a Jumpmaster. In support, he had two Arquittens and a BCC Gozanti. He had bid and chose my Fighter Ambush. I was able to Grav Shift a debris field right where I wanted it and stick my whole rogue ball on top of it. Here is the setup:


In the first turn, I did some work on the ISD, stripping shields and getting one damage through. Here is the close of round 1:


In the second turn, Thrindal used his RLBs to tie up my squadrons for the turn. My Interdictor, sensing the approach of the ISD, turned tail and ran. Here is the close of round 2:


In the third turn, I finished off the right most Arquittens with Demo, slowed the Interdictor to stay out of the front arc of the ISD, and freed up my squadron ball, allowing both Firesprays to hit the ISD. Here is the close of round 3:


The fourth turn was the culmination of the game. My Gozanti activated Morna and Jendon to soften the ISD up further. Demo hit the ISD in the side. The ISD hit back, almost killing Demo. My Interdictor stripped the Arquittens’ shields and finished the opposing flagship. In the squadron phase, my Firesprays and Bossk were able to finish off the Arquittens, completing the tabling. Here is the board state at the close:


Going into this game, I had a strong fear of his flagship. I knew that it could potentially erase both of my combat ships in a single round so I tried to keep them far apart and played very conservatively with the Interdictor. All of my objectives were bad for him, but I thought that Most Wanted would have been the least of the evils. When he picked my Fighter Ambush, I was quite hopeful of a positive result. It ended up being a very strong victory for me, but could very well have gone the other way had I engaged on his terms instead of playing conservatively with the Dictor.

Tuesday, October 2, 2018

Screed Interdictor & Rogues vs Sloane Interdictor & Quasar

For this practice match, I brought my Vassal tournament list for a showdown against a Sloane list that consisted of a Brunson type Interdictor, upgrade-heavy Quasar, and a Gozanti with BCC. The squadron ball consisted of Maarek/Jendon, 2 Defenders, Dengar, Mauler, and Rhymer. Andy took first player and chose my Superior Positions. Here is the setup:


In the first round, I sheltered Demo behind the rocks to prevent a turn two alpha-strike with bombers. I also crowded all of my squadrons but IG88 on top of the rocks to keep them from being hit by Mauler. Here is the close of round 1:


In the second round, the Quasar was first activation. There wasn’t a solid target for attack, so other than Mauler, the squadrons were mostly repositioned conservatively. I was able to eliminate Mauler with the IG88 double tap and then pick apart Rhymer. Here is the close of round 2:


In round three, IG88 and Bossk were eliminated on my side and I started in on his Interdictor. Here is the close of round 3:


In round four, the Defenders hit the rear of Demo, racking up a bunch of tokens, but were not able to finish it off before I activated and destroyed the Interdictor. I also destroyed the Gozanti with the Interdictor and some squadron fire. Here is the close of round 4:


At the top of the fifth round, Andy activated the Quasar and pushed Maarek up to hit the rear of Demo, finishing it off and securing another token. The rest of his fighters hit the rear of the Gozanti, destroying it and winning more tokens. The Quasar landed on the debris field within medium range of the Interdictor, however, and between HIEs and my unengaged Rogues, I was able to finish it off while gaining five more tokens. This resulted in a strong win for me.

I noticed a significant weakness in my own list during this game, despite the strong win. My Demo setup excels against squadron heavy lists when I am first player, but is not nearly as potent as second player. Because of the Quasar on the other side, almost all of the opposing squadrons were activated by the time Demo was able to flak in round 2 or 3. This made Flechettes superfluous and it was unable to contribute as meaningfully to the squadron fight. Most squadron heavy builds in my experience have less than five points for bid, but if I do encounter something with more than that as I did in this match, it gives me a real disadvantage in the squadron fight.

On the other side of the table, it is hard to say what would have happened had Andy held the Quasar back in round 2, but saving the squadron activations until after I had moved some of my assets might have tilted to game in his favor, though that is hard to say because it would also have let my Demolisher hit some of his unactivated squads with Flechettes.

Monday, September 24, 2018

VASSAL Tournament Round 1: CommanderDave vs JP82729

Finding it difficult to get out to local tournaments, I decided to sign up for the Vassal Tournament instead. This was my first Vassal game. I decided to run my most familiar list: The Interdictor with Screed, HIEs, DCaps, Brunson, Targeting Scramblers, Grav Shift and Engine Techs; a Gladiator II with Demolisher, Kallus, Flechettes, OEs, and ETs; a Gozanti with Hondo and Vector; and my squadrons were Morna, Jendon, IG88, Bossk, and a pair of Firesprays.

On the other side (bottom), my opponent brought an ISD 1 with Thrawn, Tua, ECM, LS, and QBT; Quasar with Boosted Comms, Ruthless Strategists, and Flight Controllers; Gozanti with BCC; and his squadrons were Maarek, Jendon, Dengar, Mithel, Tempest, and 5 TIE Bombers.

Going into this game, I had the impression that the enemy squadrons would be really tough to take down without my Kallus bonus against the Bombers. I had the mental plan of ignoring the squadrons as far as practicable and going for the tabling. That is NOT what actually took place. I took first player and picked his Fighter Ambush - a neutral objective that gave me deployment advantage.

I forgot to start the log until right after I had activated Demo on turn two. I also forgot to spend the Hondo squadron token on Demo to bring in IG88 for support. I managed to activate Mauler, Maarek, and Jendon with my Flechettes. Here is the start of my log at the opening of round 2:


During the second round, those bombers pounded Demo, reducing it to a single hull when all was said and done. It was really tense and I am glad that I was able to Flechette-activate both Jendon and Steele. In return, I dropped Dengar. Here is the close of round 2:


In the third round, I activated Demo first and put some pain on his squadrons before getting away. I turned my Interdictor away from his ISD, which was a mistake I believe, though I did double-ram his Gozanti, which resulted in its destruction after he moved it in front of the ISD. The Ruthless Strategists did their thing and put quite a bit of hurt on my squadrons before I cleaned up most of the opposition fighters. Here is the close of round 3:


In round four, I moved the Interdictor out of the front arc of the ISD, an excessively conservative move. I also lined Demo (who had repaired two hull) up for a run on the Quasar, though should have turned inward another click. Here is the close of round 4:


In round five, I was evacuating squadrons rather than pursuing the enemy. The flak, ruthless strategists, and bomber plinking had really taken a toll and I didn’t want to give up more points. I failed to get a good shot on the Quasar, but did get into position for the double arc on the following round. Here is the close of round 5:


In round six, I put some solid damage through on the Quasar between Demo, IG88, and one of the Firesprays. I had him down to 2 hull, but could not finish the job. Similarly, Demo was down to a single hull again, thanks to the Quasar and ISD. Very close. Here is the close of the game:


This was a very close game, and long too at over two and a half hours. I definitely spent more time thinking about hot keys than about the best plays. I made a number of key errors that really cost me. In round two, I neglected to spend Demo’s token to activate IG88 and provide some cover. I pushed Jendon too far from the Gozanti (or vice versa), preventing me from activating key squadrons in round 3. I pushed Morna into the squadron fight to finish an already activated Maarek in round 3, but this was a grave mistake as Morna is something of a "royal guard" to be committed in the late game or used primarily against ships. It resulted in her being the only squadron loss on my side for little gain. Also in round three, I believe I could have rammed the Gozanti with the Interdictor without pointing away from the ISD. I wanted to play conservatively, but on afterthought, I think that it could have gone toe to toe with the ISD and come out on top thanks to the asteroid-Brunson effect. I evacuated Bossk and one of the Firesprays due to low hull, but should have moved them left instead of down, allowing them to jump the Quasar at the end of turn 6.

On the plus side, I learned from previous games and placed Demo in such a way to return to the fight should it be necessary and it was. Had I been able to get a close range shot instead of medium at the close of round 5, it would have meant the end of the Quasar. Nevertheless, it was a good move to re-commit with Demo. The Blinded Gunner critical (I pulled two of them) was also the undoing of Demo’s attack run, causing me to be unable to lock down the brace. I had two repair commands, but forgot to discard the critical damage card the second time and only gave myself an extra hull. This comes of not dealing out damage cards (except face up) and relying on the hull tracker.


Lessons Learned:

- Use your tokens BEFORE shooting, no matter how exciting the shooting aspect is!

- Morna is reserve (generally), do not commit her prematurely.

- When evacuating squadrons, allow for a round six final strike if necessary.

- Always deal damage cards. Don’t rely on the hull tracker on your ship.

Friday, September 21, 2018

Dodonna Yavaris vs Cracken MSU

In preparation for a tournament that Andy was going to attend, I brought out the German Champion’s Yavaris Aces list. This list consisted of an MC80C with FCT, SAd, and ECM, Yavaris with Flight Commander and Dodonna, GR75 with Adar and Boosted Comms, and Bright Hope with Toryn Farr. The fighters were Luke, Dutch, Gold, Ten, Dagger, Corran, and a pair of VCXs. The objectives were Precision Strike, Fire Lanes, and Sensor Net. It’s a tough, flexible list with five activations that can comfortably go first or second. I had never played it before and wanted to familiarize myself with the list.

On the other side, Andy brought a five activation Cracken list with a pair of MC30s (OEs, ExRacks, XI7s, Lando on one, Foresight on the other), a pair of Engine Tech TRC90s, a Quantum Storm Slicer Tool flotilla, Shara/Tycho, and a pair of A-Wings. He had the bid and chose my Sensor Net. Here is the board state at setup:


First round, I snatched up a pair of tokens with help from my VCXs. I bunched my squadrons up, hoping to draw the A Wings out and eliminate them with Ten Numb. Here is the close of round 1:


In round two, Andy did indeed send three of his A Wings over. I failed to procure a critical with Ten Numb when I activated him with Adar. I then activated Bright Hope, which was way too far forward. Andy used his MC30 and CR90 to triple ram the flotilla, which dramatically reduced my squadron efficacy. I was able to eliminate his three A Wings, but had few squadrons in position for bombing. I had last activation with the MC80, but was so focused on he squadron and token play that I forgot to shoot the MC30 at close range. Here is the close of round 2:


Round three opened with with MC30 hitting my MC80, which burned its brace. The Slicer flotilla was able to slice Yavaris, which hurt. I was able to eliminate the remaining A Wing without issue and proceeded to bomb the CR90, but couldn’t get enough bombers into the fight with Dagger in particular stuck on the station. I used my MC80 to bring the CR90 down to a single hull remaining, but had to move it up into a nasty close range double arc position next to the other MC30 with no brace remaining. I also forgot to use FCT this turn, which left my squadrons in less-than-optimal positions. On the other hand, I was grabbing up tokens like popcorn. The unactivated MC30 was indeed able to finish off my MC80, but I was able to eliminate his CR90 with Cracken aboard thanks to Corran Horn in the squadron phase. Here is the close of round 3:


In round four and five, I attempted to escape with Yavaris, but Andy was able to run it down and eliminate it with blue dice from an MC30. What would have been a very bad defeat was softened considerably by all the points I scored from Sensor Net. I ended up with a solid 180 points from the objective.

In deployment, I made the mistake of placing my fleet in the center. It would have been better to deploy  to the side to reduce flanking potential. Bright Hope was also isolated from the rest of the fleet, leading to it being singled out for early destruction. This could have been mitigated by me dropping to speed 1 on the first turn instead of steaming forward for two rounds at speed 2.

The placement of the squadrons is extraordinarily important, especially the B Wings due to their low speed. Even the speed three squadrons felt a little slow, emphasizing to me the importance of planning and positioning. The Sensor Net objective added an extra layer of complexity that had to be taken into account. By turn three, I was already making mistakes due to mental fatigue. Practicing the list would mitigate this, but it has a lot of moving parts to account for.

Overall, Andy did a nice job lining up both of his heavy hitters to drop my MC80 in one round of fire. His A Wings were effective at distracting my squadron ball for a turn, and his slicers prevented the key Yavaris turn. On my side, if I were to run this list in a serious way, I would need to practice a good deal with squadron placement and movement.


Wednesday, September 5, 2018

Dodonna MC75 vs Screed Dual ISDs

This list has evolved significantly from a triple MC30 Ackbar list into this present form. I really like triple MC30s, but find that the non-Admonition 30s are simply too susceptible to being destroyed outright by ISDs or Liberties. Having three of them also opens me up to being forked fairly easily unless I play conservatively. The obvious answer is Rieekan, but I have a strong aversion to him. My triple 30 lists also tend to cap at 5 activations, which just is not sufficient. By dropping the non-Admo 30s in favor of a 75 and a Hammerhead and utilizing the best officer ever (Strategic Advisor), I can boost my activations and staying power while maintaining three really solid threats. 

Rebels have a lack of commanders that synergize well with both large and small ships. Raddus and Rieekan would both fit this list reasonably well, but both of them change some of the fundamentals of the game and as a result, are less enjoyable to me. Dodonna, on the other hand, doesn’t radically alter the game and he works very well with my black dice ships. Garel’s Honor is also made awesome. Plus he’s cheap. Done deal.

I chose what I think are strong objectives: Most Wanted, Firing Lanes, and Salvage Run. With VCXs, I can score some solid points. My list was: MC75 Ordnance with SAd, OEs, ECM, APTs, and ExRacks; Admonition with Lando, OEs, APTs, RBDs, and H9s; Garel’s Honor with ExRacks; Slicer/Quantum GR75; Comms Net GR75; and Shara/Tycho with a pair of VCXs.

On the other side, my usual opponent, Andy, brought Dual ISDs at my request. He chose Screed, a BTA Kuat, Cymoon (No ECM), and a Comms Net Gozanti with Howlrunner, Ciena, and Valen as the screen. He chose first and picked Salvage Run, which guaranteed me 80 points. Here is the setup:


Unfortunately, I missed the round one image. In the first round, I was able to gather two of the tokens thanks to the VCXs. I got the other two during the second round. In that first round, I was also able to set up the MC75 to almost guarantee a double arc shot after the Cymoon activated in round two. Here is the close of round 2. The Cymoon was stripped of shields and had taken heavy damage at this time. I placed Admonition to take a shot and finish off the Cymoon on the following round.


In the third round, I did indeed finish the Cymoon. Admonition rolled terribly and eked out four damage without a black crit. I was forced to use the Hammerhead to finish the job with a ram. Here is the close of round 3:


In round four, my Hammerhead was destroyed, as was the Gozanti - thanks to a Dodonna assisted structural damage. We called it at that point as the Kuat could fairly easily escape.

This was a quick game that was essentially decided at setup. Because of my greater number of deployments, I was able to hold back both of my heavy hitters until after the ISDs were placed. Because of the speed and placement of the ISDs, I knew that I could reliably isolate and eliminate the weaker of the two. Had the Kuat been placed on the outside and the Cymoon on the inside, the result may have been quite a bit different. I may also have deployed my heavy hitters more toward the center and that would have delayed engagement and allowed for better re-positioning.


Lessons Learned:

- Deploy the weaker/slower asset to the inside of the formation, giving it a more sheltered position. The Cymoon tends to prefer slower movement while the Kuat moves fast.