Tuesday, February 26, 2019

Screed Dictor & Demo vs Screed Kuat & Demo

For this game, I wanted to try out a modification to my squadron ball and objective selection. I dropped Ciena and a Firespray for the following: Morna, Maarek, Jendon, Boba, and the new inclusion of Dengar and Mauler. My thinking here was to prevent my bombers from being tied up and to give me greater offensive power against opposing squadron balls. For this, I lose a bit of bombing power and the near immunity to flak that Ciena provides. On the other side, Andy brought a list semi-tailored to counter my own. He had Screed on a BTA Kuat, a Flechette Demo (same as my own), and a Vader Raider to knock out my Targeting Scramblers. His squadrons were Ciena, Valen, Gamma, and Jonus. He chose my Close Range Intel Scan. Here is the deployment after I used the Grav Shift (I had already moved my Gozanti when I remembered to take a pic):


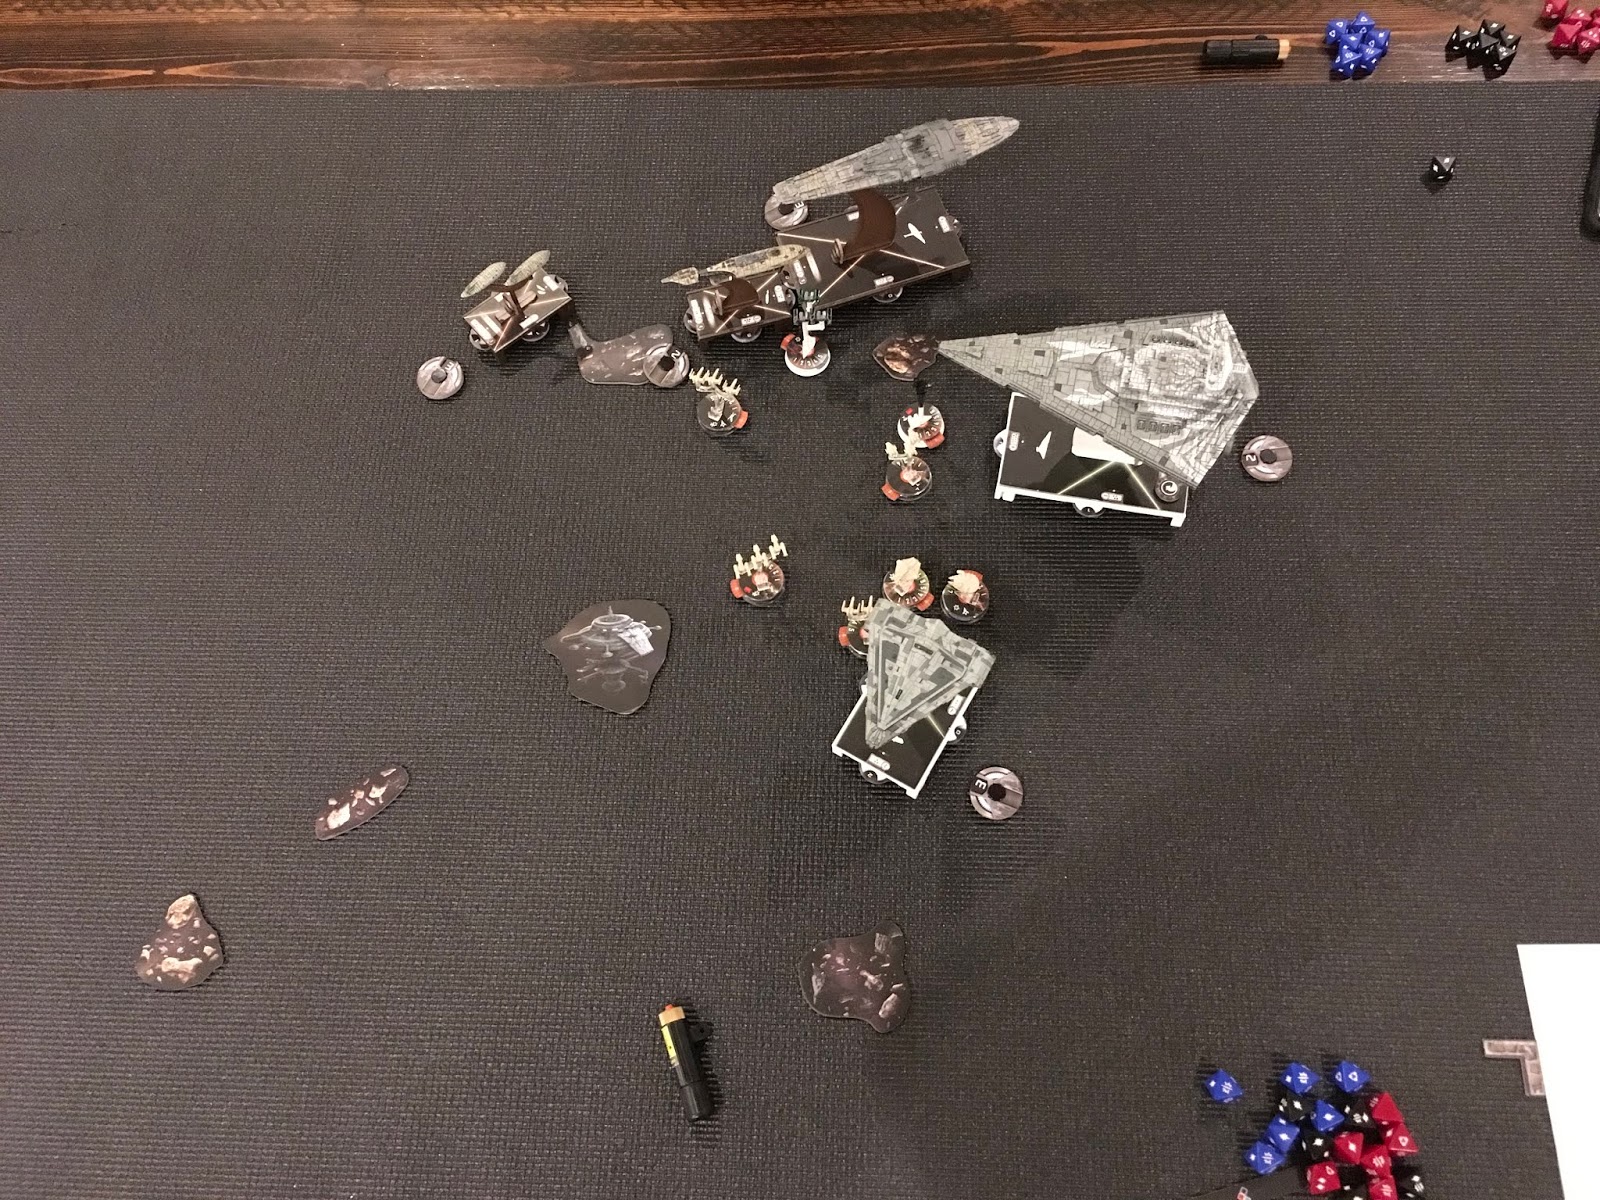
In the first round, I positioned my Interdictor at the base of the dust field. Depending on how aggressive Andy was with the Kuat, I could move to the inside for shelter. I put my squadrons behind the dust field as well. If Andy wanted to hit my squadrons with his Demo, he would have to move in front of my Dictor and Demo to do it and open himself up to counterattack. Here is the opening of round 2:


In the second round, Andy kept the bombers on the rock and moved Ciena forward. I hit Ciena in return with Mauler. I scored a lucky roll with the Interdictor and popped his Gozanti. Boba and Morna hit the Raider and brought it down to two hull remaining after it jumped into Vader range. Here is the opening of round 3:


In round three, I cleaned up the Raider after it cleared my Scramblers. My Demo hit his bombers. His Demo hit the Dictor. Andy elected to pursue my Demo with the Kuat and leave the Dictor alone. Morna, Boba, and the Dictor did good work softening Demo. Here is the opening of round 4:


In the fourth round, Andy BTAed my Demo. I cleared some shields from his Kuat with the Dictor. His Demo Flechette-activated Boba. I only needed on hull damage to finish Demo, so I sent Jendon over to pass an attack to Boba, but Boba failed me. I had to send in Maarek to get the job done. I was really hoping that Maarek could start in on the ISD. Oh well, the Demo went down. My squadrons were strung out. Here is the opening of round 5:


In the fifth round, Andy turned the Kuat in to chase my Dictor. He managed to stay entirely in my rear arc. Morna hit the ISD. Here is the opening of round 6:


In the sixth round, Andy killed my Gozanti, which prevented me from sending Maarek against him. Fortunately for me, the Dictor and Morna were enough to finish off the ISD. Jendon was in range as well to pass a second attack to Morna if needed, but that proved unnecessary. It ended as a strong win for me. Andy clearing my Scramblers prevented me from helping Demo to survive the Kuat shot. He had to choose between BTA-killing my Dictor or my Demo and he chose the Demo, thinking that it would be easier to follow up against the Dictor afterwards. By this time, we had activation parity though, so he was unable to get the close range shot that he needed to kill it.

Switching out Ciena and the Firespray for Dengar and Mauler let me kill Ciena and Valen, but I feel like I could have accomplished more with that third rogue. I may even have been able to finish off the Raider on turn 2 before it could remove my Scramblers. My inclusion of Close Range Intel as an objective is good. I really like having the dust field to hide behind if necessary. I can see this one being a solid objective against Cymoon and red-dice-heavy lists. I didn’t collect any tokens, but the added obstacles made up for it. 


Monday, February 18, 2019

Local Tournament Round 2: Screed Kuat & Decimators vs Raddus Liberty & Admonition

Thanks to my bye, I was paired with none other than my usual opponent (Andy), who I also drove with. I was running an ACM BTA Kuat and HIE Raider with a Gozanti and squadron component of Mauler/Dengar, Morna, and 3 Decimators. Andy took first and picked my Close Range Intel Sweep. I deployed in the corner to make him come to me and to decrease his flanking options. I also had Pryce on the Kuat, which I set to round 3 after seeing his deployment and speed. Here is the opening of round 1:


In the first round, I moved forward slowly, as did Andy, with his CR90 attempting to circle around to the rear. Here is the opening of round 2:


In the second round, I turned my formation inward. My Decimators ground Tycho up. Here is the opening of round 3 before the Liberty was placed facing the Kuat, just to the right of Admo:


In the third round, my Raider had no shot and I accidentally rammed my Gozanti. Admo jumped into position for a sweet activation. The Liberty shot the Raider for little effect thanks to Brunson. My Kuat got a medium range shot on Admo, which was reduced down to a single damage, but I made him blow Lando. I made a mistake here and meant to ram the Liberty and drop back to the speed two joint, but miscalculated and ended up close enough that the Liberty could just fly right by me. I didn’t want to spend my Nav token to drop down to speed two as I intended to flee the scene in the following round. Oops. Mauler finished Shara and my Decimators began to go to work on Admo. Here is the opening of round 4:


In the fourth round, the Liberty managed to maneuver out of the Kuat front arc in the first activation. I then activated my Raider in order to get a volley off on Admo. This cost my Gozanti, as Admo easily disposed of it. My Kuat was able to deliver a side/rear double arc shot on the Liberty triggering ACMs on both shots. The CR90 double-rammed my Raider. My squadrons barely managed to finish off Admo. Here is the opening of round 5:


In the fifth round, my Raider was able to DCap/HIE against the Liberty, which had made some repairs with the first activation. This softened it for my Decimators. The CR90 finished my Raider and my squads finished the Liberty. Here is the opening of round 6:


In the sixth round, I put some damage on the GR75, but was one or so damage shy of finishing it off. The CR90 flew into range of the Kuat, who scored a long range accuracy for a CRIS token (my third of the game). That concluded the game with a 9-2 in my favor.

My list performed well. Pryce was a solid asset on the Kuat and Brunson worked very well on the Raider. The Decimators took damage and just kept on going, which I loved. On the flip side, I felt like their anti-ship damage was well under the 1.5 expected average damage. Other than the failed ramming attempt with my Kuat in round 3, I believe I managed things well.

I was really disappointed to get the bye and doubly disappointed to be paired with Andy for my only game. I was really hoping to try this list out on a couple different opponents in order to better assess the efficacy of both the Decimator-Heavy squadron component as well as the Kuat/Raider combo. Alas, it was not to be.

Sunday, February 17, 2019

Local Tournament Round 1: Raddus Libery & Admonition vs Vader Dual Cymoon (Observer)

We made the short drive out to Cool Stuff in Orlando for the monthly Armada tournament. I really wanted to try out a couple variants to my usual Screed Interdictor/Demo & Rogue build. Unfortunately, there was an odd number of players and I got the bye so I missed the first round. As I was sitting around anyways, I grabbed pictures for a match between Andy and Tim (Crabbok). Andy was running his Raddus Liberty/Admo list and Tim brought a pair of Cymoons with Vader as his commander. The Cymoons were interesting. He went with Spinals, Quad Cannons, and Veteran Gunners. The idea here was to fish for a red accuracy with Veteran Gunners, add an additional red, and then re-roll with Vader. He also had IFF to smooth things out. These Cymoons had some extremely high potential damage.


Andy had the bid, picked first and selected Dangerous Territory. Here is the opening deployment. The Cymoons were at speed 1:


In the first round, Tim reduced the Cymoons to speed 0 to delay the Raddus drop. Andy also played it safe. Here is the opening of round 2:


In the second round, Andy continued to operate conservatively. Tim bumped it up to speed 1, but turned his rightmost Cymoon inward toward Admo. He caught it right away that he made a big mistake here and allowed the Liberty a perfect flanking drop with the CR90. Here is the opening of round 3 right before Andy placed the Liberty to the side at long range of the leftmost Cymoon:


In the third round, Andy popped the Gozanti and Tim popped the GR75. Tim did a long range shot on Admo as well, and after modification and effects, did a net 1 damage. This was a huge disappointment for him as that was a ten-dice shot. Here is the opening of round 4:


In the fourth round, Andy hit that Cymoon hard with the Lib and Admo, but couldn’t quite bring it down. Tim likewise couldn’t quite bring down Admonition. Here is the opening of round 5:


In round five, Andy fled with Admo on two hull and finished off the flagship Cymoon. The remaining Cymoon had nothing worthwhile to shoot at and was at full health still. No other losses occurred. Here is the opening of round 6:


Andy ended up with an 8-3 win. They were even on objective tokens. Tim made the decision to re-roll a couple times with worse results than the initial roll. That’s a tough call. He most certainly could have eliminated Admo with even average results. His second turn decision to point the leftmost Cymoon inward was probably the key mistake here. Had he remained at speed zero and banked the Nav token, things may have gone very differently. Andy did well to capitalize on the open flank and to concentrate fire on the flagship. He played conservatively and was rewarded with a strong win.

Tuesday, February 12, 2019

Sato MC75 & Admonition vs Raddus Liberty & Admonition

For this game, I brought a Sato list with an MC75 and Admonition with Intel Officers and ACMs (plus the usual assortment). In support, I had a Comms Net flotilla, Shara/Tycho, Han, Ketsu, and a pair of VCXs. Adding the VCXs allowed me to take some token-focused objectives. On the other side, Andy brought a Raddus list with a tricked out Admonition, TRC90, Slicer Storm, and Shara/Tycho. The primary threat was the LMC80 with Spinals/H9s in hyperspace. He chose my Sensor Net. I deployed in the right corner facing inward. Here is the deployment:


In the first round, I grabbed some tokens and spread my remaining squadrons out for flexibility. I puttered along at speed 1 to facilitate the token grabbing game. Here is the opening on round 2:


In the second round, I grabbed more tokens. I also pushed Admonition out ahead to put pressure on Andy’s Admonition. Here is the opening of round 3 (Right before Raddus placed the Lib in front of the 30, just outside of long range):


In the third round, I put some damage into the CR90 and Admonition while Andy hit my own Admonition and positioned his MC30 to threaten my 75 in the following turn. Here is the opening of round 4:


In the fourth round, Andy activated his MC30 first, killed the flotilla, and made me exhaust my ECM to brace a heavy shot to the rear. This let me activate my own MC30 and deal a bit of damage to the LMC before dodging the front arc. My 75 activated next and I put some damage into Admo (out the rear with External Racks) and the CR90. The Liberty did some work against the 75 and dropped it to 2 hull. My squadrons finished off the CR90. Here is the opening of round 5:


In the fifth round, the Liberty finished my 75 without issue and I put some squadron damage into the Liberty, but Andy was repairing with Raymus so I was able to make little headway. I was able to finish off Tycho while he killed a VCX. Here is the opening of round 6:


In the final round, I picked up one more token. Andy managed to gain a 40 MOV victory when we tallied it all up. It was much closer than I thought it would be.

Some thoughts on my fleet design: I’ve been considering how to make a low activation count, Rogue-Heavy rebel build work. I would love to go with 7 YT2400s, but I’m not going to buy 5 more expansions just for that. I also wanted to play around with Sato as he is one of the few Rebel commanders (Besides Rieekan and Dodonna) that synergize with squadron play. With a low activation fleet that isn’t utilizing Pryce and a huge bid, the squadrons need to do the heavy lifting and the ships need to be able to take a beating and keep going. Intel Officers are good, but I need to preserve my ships so Lando on Admo is the better choice and either Bail or DCO on the 75 would improve survivability. I also need some heavy bombers in the squadron wing. A pair of Scurrgs with Hera would help immensely here, though I would certainly struggle against other squadron-heavy fleets without some mitigating factor.

On objectives and deployment, I regret including Sensor Net. It pushed me into a very predictable deployment formation and low speed, which allowed Andy to maximize his positioning for the ideal Liberty deployment. Salvage Run may have been an improvement. Alternatively, pointing my fleet away from the center would have helped to prevent the Liberty drop directly in front of my fleet.

In the fourth round, I should have preserved my ECM/Brace for the inevitable shot from the Liberty and instead redirected Admonition’s shot. That was a mistake on my part that may have allowed my 75 another turn on the board. Throughout the game, I really failed to focus my fleet on a single enemy. I did damage to all three of Andy’s combat ships and only managed to barely bring down the CR90.

On the other side, Andy did a nice job on his Raddus drop and he did well to bring Admonition in aggressively against the MC75 in order to encourage me to use the Brace/ECM. Taking two big shots in a single round is rough. Solid performance on Andy’s part.


Tuesday, February 5, 2019

Sato MC75 & Admonition vs Thrawn/Pryce 2-Ship

I brought a Sato list for trial against my usual Armada partner, Andy. It consisted of an Ordnance Cruiser with Wide Area Barrage, Intel Officer, ECM, OEs, and ExRacks; Admonition flagshipship with Intel Officer, OEs, APTs, and Spinals; a Leia Comms Net GR75; and for the squadrons: Tycho, Han, Hera, Dutch, Wedge, and Rogue Squadron.

On the other side, Andy brought a Thrawn 2-Activation Fleet with a Kuat and a Quasar (with Pryce). For squadrons, he had Maarek/Jendon, Mauler, Jumpmaster, Gamma, Jonus, and a pair of Firesprays. He had the bid, took first player, and chose my Solar Corona. He set up in the corner, facing inward with the Kuat on the outside, which was a solid position. I place somewhat across from him with the intent of moving forward at max speed to catch the Quasar in the second round right after it used Pryce. Learning from my previous game against this list, I was prioritizing that Quasar. Here is the setup:


In the first turn, I moved my fleet forward at speed three. I had mostly Rogues, so I wanted to have them available to hit his squadron ball after he hit my MC75. Here is the opening of turn 2:


In the second turn, Andy slow-rolled his Kuat up and I moved to intercept the Quasar with the MC75 while keeping Admonition sheltered on the flank. Andy’s squadrons hit the MC75 hard, but it held together. He also moved Mauler over to hit Hera-Dutch-Wedge. I had placed Tycho in the path of his Quasar and ISD at the opening of the round and this forced Andy to use his Jumpmaster to free up some squadrons, as a result, I was able to then reposition Tycho after the Quasar move/overlap to tie up his two bombers which had not activated. He then activated them and moved them away from Tycho. My squadrons jumped in and did some work after disposing of Mauler. Here is the opening of turn 3:


In the third turn, Andy activated his Quasar first and hit the MC75 again. Because of my positioning of Rogue Squadron on one side and Dutch etc. on the other, he wasn’t able to free everything up to hit the 75, but he did some good damage and managed to bring it down to something like 2 hull remaining. In retaliation, the 75 hit the Quasar with 7 black dice and a red for 13 total damage (wow). With Wide Area Barrage, I was able to put 4 damage into Maarek Steele. The Kuat wasn’t able to finish the 75 either and Admo put some APT damage into the Kuat. I forgot to Intel Officer the brace here. My squadrons were able to clean up most of his (minus Jonus and Jendon). Here is the opening of turn 4:


In the fourth turn, my MC75 finally went down and I began to put some pretty significant damage into the ISD with my MC30. I finished off Jonus and chased the Quasar with Hera, Han, and Dutch, hoping to get the last bit of damage into it. Here is the opening of turn 5:


In the fifth turn, the Kuat attempted to make an escape, but ended up in the double arc at long range of the MC30, which finally got to use its spinal armament (that upgrade wasn’t really worth it). Combined with a CF dial, I was able to finish off the Kuat. The Quasar repaired a bit and managed to make an escape from my squadrons. We called the game at that point. Victory for Sato.

On my side, I really liked Wide Area Barrage, which I had never used before. I only got to shoot once with the MC75, but it soaked up substantial firepower over the course of rounds 2 and 3, which allowed my squadrons to eliminate his and to even do a little bombing themselves. The four points of brace/scatter-proof damage was sweet and could have eliminated a flotilla. Still, my squadron presence was strong enough that I didn’t need the help there and would have been better served with ACMs on both combat ships. Hera-Dutch-Wedge is a great combo and can really clean up opposing squadrons if they are left free to rampage. They also contribute an extra 3.25 average damage to ships in a pinch. I would have liked a little heavier anti-ship squadron presence, but I’m at a loss for how to do that without greatly degrading the anti-squadron side. This is where Imperials really shine with their Morna-Maarek-Jendon combo -- a fantastically flexible squadron presence that only requires a Gozanti for support.

On the other side of the board, Andy had a very formidable squadron alpha-strike, but struggled to get the BTA Kuat into play at the right time. He sacrificed his squadrons to try to take down the MC75, but couldn’t do a solid kill-shot on my remaining ship with his Kuat. I think having Pryce on the Kuat instead of the Quasar would help immensely to bring the heavy guns to bear. It would require an earlier alpha-strike with the Quasar, which would open his fighters up to flak and squadron counter-attack, but it might be the right trade-off. Alternatively, a longer threat-range from the heavy guns in the form of an ISD2 or Cymoon variant might help with that activation disadvantage.

I anticipate Sato being a very fun commander in the new Sector Fleet rules with larger point caps, though he still has Ackbar to contend with.