Friday, March 29, 2019

WORLDS Round 4: Dave vs Derek

My final game was against Derek (Crewgar) of the Canadian contingent. He had a fairly typical Thrawn 2-Ship build, though he had Brunson on the ISD and Pryce on the Quasar. He picked my Superior Positions and deployed in the center. He set Pryce for round 1. Here is the opening of round 1:


In the first round, he jumped Morna, Rhymer, and Maarek up to hit my Dictor. It was fairly ineffectual. I countered back in the squadron phase, though due to a bit of a blunder on my part, caused Morna to be obstructed against Rhymer and wasn’t able to finish him off. Here is the opening of round 2:


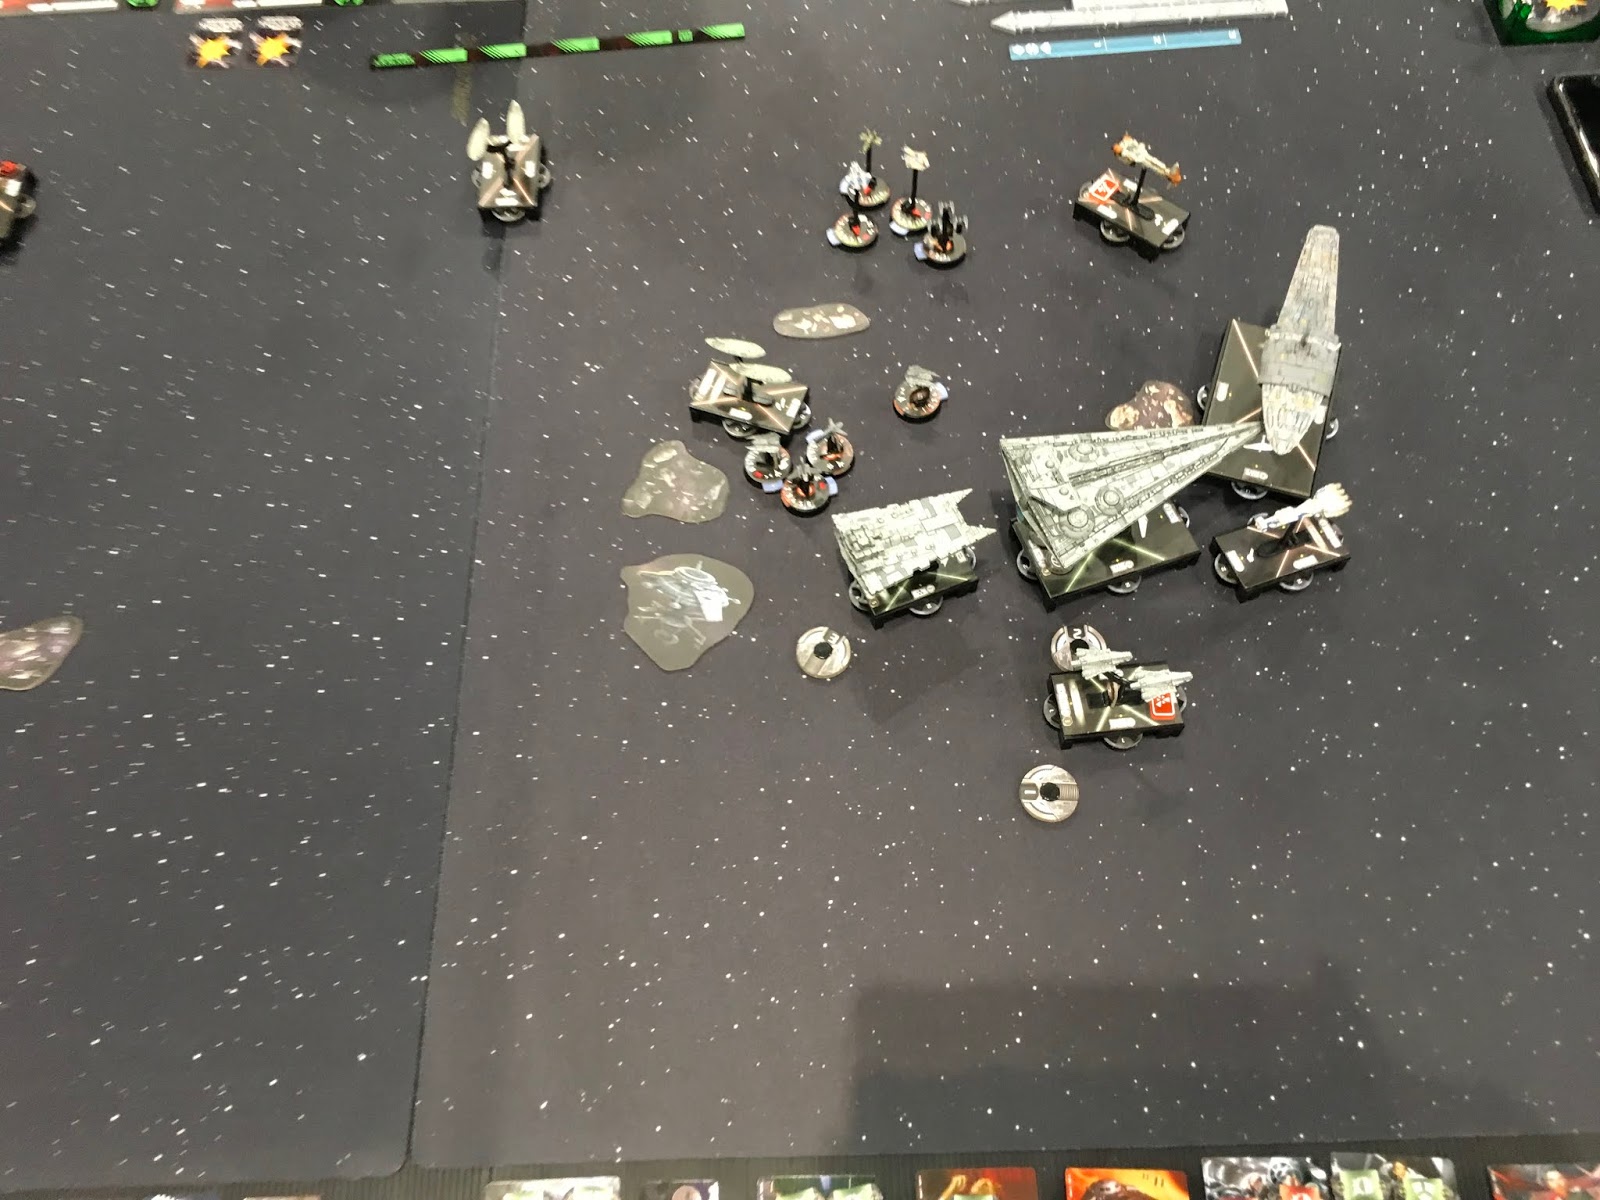
In the second round, the squadrons went at it with Demo throwing out its flak in support. I used HIEs to soften the rear of the Quasar. Here is the opening of round 3:


In the third round, I continued to reduce the squadrons. Here is the opening of round 4:


In the fourth and fifth rounds, I mopped up the rest of his squadrons. Demo escaped from the Avenger front shot without too much trouble. Derek started circling back with the Quasar. When he started coming back, he was hoping to command his squadron remnant. I pounced on him. Here is the start of round 6:


In the sixth round, I finished off the Quasar and earned several more objective tokens. Between his squadrons, the Quasar, and the tokens, I managed to get an 8-3 win. This one was a better game for me. I had prepared quite a bit for Thrawn 2-Ship lists and it turned out that my preparation finally came in handy. I also managed to not make any glaring mistakes. This wrapped up my 2019 Worlds experience, which I’m glad ended on a positive note. I was 61st in the standings, so did not progress to day 2.

A few general thoughts that pertain all of the games:

I was overly aggressive with Ciena, Maarek Steele, and Demo throughout the day. I need to either moderate that (unlikely), or increase the latter’s survivability. In the squadron play, I tend to just throw Maarek and Ciena out there, which works much better when you have a Quasar pushing additional squadrons out, but if Maarek and Ciena can’t kill the target, the counterfire is rough on Maarek especially. This happened in games 2 and 3.

Flechettes were used a couple times, but I ended up using Demo against ships in all four games. Given that, it may be wise to reconsider that role. I anticipated more Rieekan Aces with low bids, but most of the squadron-heavy fleets had larger bids to use in conjunction with Pryce so by the time my Demo was able to activate, the bulk of the opposing squadrons were already activated with a Quasar (games 1 and 4), rendering Flechettes useless.

I regret dropping Boba and the Firespray for Bossk and the Decimator, the Decimator was easy to tie up and having heavy is a major disadvantage. Nevertheless, I doubt that this minor change would have drastically altered any outcomes.

Overall, great experience, really good to get to meet so many phenomenal Armada players.

WORLDS Round 3: Dave vs Ben

After the game two thrashing, I was hoping for an easier time of it. Unfortunately, I was paired against Ben (Vergilius on the forums), who I knew to be fantastic with the Liberty. He had a Reeikan list with the LMC80 Star Cruiser type with SW-7s, a TRC90, a CR90 with HIEs and Engine Techs, flotillas, and a nasty little squadron ball that consisted of Shara/Tycho, Corran, and Dash. He had bid and gladly gave me second as he had Bail on the Lib. I missed the deployment shot, but I picked his Salvage Run and here is the close of round 1:


In the second round, I managed to really do a number on his HIE CR90, but it escaped with almost no shields and a single hull remaining. With Demo, I hit his TRC90 and ETed up into the Liberty side arc, hoping to escape his front shot on the following turn. Unfortunately, he had a Nav command ready and was able to drop to speed 1, land on the rock, and then Engine Tech to land on the rock a second time in order to get just a sliver of the rear portion on my ship into his front arc. On the squadron front, I had managed to kill Dash and Corran while losing Maarek and Ciena. Here is the opening of round 3:


In the third round, the Liberty activated first with Bail and was able to one-shot Demo and then ram his own flotilla to stay in place, taking yet another rock damage. On my side, I inexplicably turned my Gozanti inward to force myself to go into the Liberty front arc on the following turn. Here is the opening of round 4:


In round four, I managed to eliminate his flotilla, which I had damaged earlier. I lost Bossk and the Decimator while killing Tycho. I damaged Shara. Here is the opening of round 5:


In the fifth round, I finished off Shara with Morna and Jendon, but everything else got away. Ben won with a 7-4 score. He definitely outplayed me and was able to tie up my squadrons and eliminate many of them, scoring more than he lost. The Toryn rerolls helped with damage consistency. He was also very careful to preserve points and managed to keep all of his combat ships alive, despite them all taking significant damage. I struggled to concentrate my firepower and I really felt the lack of Intel on this one.

WORLDS Round 2: Dave vs Billy

In my second game, I was matched with Billy from the ORJ. He was running a Raddus build with an MC75 Armored Cruiser with a CR90 on board that had MS-1s. He took first and picked my Most Wanted of course. Here is the deployment. His objective ship is across from the Interdictor:


In the first round, I moved the Dictor up and slid Demo in behind, a good start. Here is the opening of round 2:


In the second round, I jumped Maarek and Ciena onto a HWK and failed to kill it. Maarek went down from the return fire of the HWK and two VCXs. I was hoping to remove any obstacles to bombing later in the game. He dropped the 75 and CR90 at the opening of round 3:


In the third round, he softened the Dictor with the CR90, which I then destroyed with the Interdictor. He also put some significant damage through with the 75. I jumped Demo in front of the 75, thinking I could take a shot from the 75 and then escape after inflicting some nice damage. Here is the opening of round 4:


In the fourth round, Billy was able to kill Demo, despite Targeting Scramblers and then he finished off the Interdictor, who was pinned in place, ending the game by tabling me. This was a terribly played game on my part. I’m not sure what I was thinking on this one, but I served the game up on a silver platter. I should have ignored the HWKs and focused on the Raddus drop. It would have been an easy thing to put squadrons in place where I knew he was going to drop. Secondly, I placed Demo in the only place on the board that it could have been in danger and really paid for it. Instead of taking that risk, I could have turned the other way or even rammed the Dictor. My concern at the time was to preserve the Dictor, but it would have been much more wise to leave it and let my squadrons finish the 75, which would have given me the win. Well done to Billy, who is solid player.

WORLDS Round 1: Dave vs Jeremy

For Worlds, I brought my Screed Interdictor & Flechette Demo list. I switched out some squadrons and ended up with Morna, Maarek, Jendon, Ciena, Bossk, and a Decimator. I had grossly unfounded concerns about running into generic-heavy squadron builds, which was why I took Bossk and the Decimator over Boba and a Firespray.

First round was against Jeremy, who won in the Virginia Regionals. I love his list with the Dictor and the Quasar. It has a great squadron component that consists of Maarek, Jendon, Mauler, Howlrunner, Saber, Valen, and a pair of Firesprays. He had the bid and took first. He picked my Hyperspace Assault. I missed the deployment picture, but here is the close of the first round. At the beginning of the second, I placed my Dictor off the center token in order to kill the Gozanti:


In the second round, he was able to alpha-strike Maarek. I was able to flak with Demo in return and eliminate Saber and Valen. I also knocked out his Gozanti. Here is the opening of round 3:


In round three, we continued the brutal squadron fight. I lost my Decimator and Ciena and he lost Maarek and Mauler. Here is the opening of round 4:


In the fourth round, I lost Bossk and finally killed Howlrunner. I started to give chase to the Quasar. Here is the opening of round five:


In the fifth round, Jeremy almost killed Morna with the Firesprays. With Jendon, she was able to finish both of them off however. Unfortunately, that meant the Quasar was able to escape. Here is the opening of the final round:

Jeremy was able to escape with his Quasar, leaving me with a tight 6-5 victory in the first round. I was happy to take the win against him. Neither of us spent much time hitting the Interdictors as we both judged them to be too tough to take down. The squadron fight was brutal and messy. Great game!

Tuesday, March 12, 2019

Screed Dictor & Demo vs Dodonna Liberty

In this game, I experimented with a number of different objectives to see how it fits my play style. Andy brought a Dodonna Mon Karren Critical-Drill type MC80, a pair of TRC90s with Engine Techs, a Comms Net flotilla, Quantum Storm/Slicer flotilla, Tycho, HWK, and two VCXs. We were tied for bid and we flipped for it. I got to choose and I picked 2nd in order to try out my objectives. Andy chose my Station Assault. He had a slight deployment advantage and was able to place Mon Karren last. Here is the opening setup after I shifted obstacles:


In the first round, I turned inward and used the Dictor to shelter Demo for the time being. I kept the Firespray and Morna in reserve. Here is the opening of round 2:


In the second round, Andy was able to ram my flotilla with his CR90 on the right. I moved Demo in to trade up if he decides to double-ram the Gozanti on the following round. Slicer Storm sliced Demo (who was at speed 3). I moved my Interdictor out of range of MK, and he moved in for a rear shot with the same. I definitely made a mistake by having Morna and and Firespray out of the action against that CR90. Here is the opening of round 3:


In the third round, the CR90 did indeed double-ram my flotilla. I made another mistake of activating Demo before the Dictor. I finished off the CR90 and landed on the rock. MK activated and put some fairly significant damage through into the Dictor, including the XX-5 double Dodonna criticals. Andy chose to half my repair value and then only allow a single attack each round against ships. Ouch! I activated with a repair and combined it with a token to remove the half-value critical. Tycho tied up Morna and I moved Maarek, Jendon, and Boba over. Here is the opening of round 4:


In the fourth round, Andy activated Quantum Storm first and sliced the Dictor to prevent it from ETing in front of Demo in order to keep it on the board. He correctly divined my plan here. I activated my Dictor to get further away from MK. I landed on the station and healed the other crit, but thanks to the slice, could not get far enough in front of Demo. The remaining CR90 killed the first station. Demo managed to procure a red accuracy thanks to the CF dial and killed that pesky Quantum Storm. One more turn of slicing and Demo would have flown off the board. My squadrons killed Tycho and the HWK, but they prevented me from hitting MK. Here is the opening of round 5:


In the fifth round, Andy had the double-arc on the Dictor. He scored a solid hit with his side arc as well as a really good hit with the front. The side shot depleted all of my remaining shields and the front arc shot came very close to finishing the job. I was able to activate and repair a damage and then finish off MK with combined fire from the Dictor and the squadrons. I lost my Firespray to flak. The TRC90 moved in for the killing blow against the Dictor, which was down to just a few hull remaining. Here is the opening of round 6:


In the final round, Andy was hoping to kill the Dictor. He had the double-arc and used TRC on his side arc shot for three damage. I scrambled it down to 1. He then did a front arc shot and only scored a single hit, which I used Brunson to negate. After the double-ram, the Dictor would remain on a single hull point. So close. We called it at that as the CR90 would not have had much chance against my squadrons and a shot from the Dictor combined.

On my end, I made a number of mistakes. I should have kept Morna and the Firespray up with Boba in order to draw Tycho in or to hit the CR90 and finish it off. I also should have activated my Dictor before Demo in round three -- a mistake which resulted in two very nasty crits. Lastly, I ignored Quantum Storm, which wreaked havoc with my ships and was very close to forcing Demo off the board single-handedly.

On the other side, Andy brought a pretty devastating list. The Mon Karren setup was just deadly. In addition to the title, it had ETs, Bail, SW7s, C&S, Spinals, and XX-5s. He handled Quantum Storm very well. It became more than just a nuisance. He was perhaps a little aggressive with his right-wing TRC90, and a little conservative with his left-wing one, but the left-wing one had Dodonna on board, so I can understand playing it safe there. He played well and really should have been able to kill the Interdictor, had his last shot been so poor. Really good game.

Monday, March 4, 2019

Screed Dictor & Demo vs Screed Cymoon & Dictor

Andy brought another Screed list as a counter to my own. This time, he had a Cymoon with Avenger, Needa/TRCs and Quad Cannons, an Interdictor with Overload Pulse and all the bells and whistles, a pair of token passing Gozantis, and a squad ball consisting of Ciena, Valen, and Jonus. I had the bid, took first, and picked his Contested Outpost. I moved the outpost and then he moved it again to make it mostly out of play. Here is the setup:


In the first round, I landed on an asteroid with the Interdictor, taking the crit that prevents long range attacks. An inauspicious start. I split the Dictor and Demo to make Andy choose between the two with his Cymoon. He managed to keep out of range of the Dictor regardless of my crit. Here is the opening of round 2:


In the second round, I rammed my Demo with the Gozanti to prevent myself from getting into Cymoon range. I then turned in with the Dictor and repaired the crit with a repair token from the Goz. Lastly, I sent Jonus in to range one of one of the opposing Gozantis and then hit that Gozanti with Demo, knocking it out. I thought I could Engine Tech out of range of the Cymoon again, but alas, that was not to be. The Dictor Overload Pulsed my defense tokens and the Cymoon was able to get the six damage to kill me thanks to Screed and the TRC. My squadrons hit the Cymoon in return. Here is the opening of round 3:


In the third round, I came in behind the Cymoon to give chase. My own Gozanti was eliminated. My squadrons did work. In the fourth round, I eliminated his second Gozanti with a Jonus assisted shot. The Cymoon was down to just a couple of hull by the end of the round. My Ciena finally went down as well. Here is the opening of round 5: 


In the fifth round, I finished off the Cymoon. We called it at that point as we had lost count of the rounds and thought that it was the sixth. Andy was able to collect two station tokens. I managed to win by just 40 points, so it was quite close.

I felt like I messed this one up in a couple places. First, the Interdictor positioning at the end of the first round was not good. I landed on the asteroid simply out of carelessness and had I done almost any other maneuver, I would have been in range of the Cymoon at the top of the second. My other mistake was being way too greedy with Demo. Instead of popping a near worthless Gozanti, I could have headed for the station to pick up points that way instead. I blame Jonus. I was itching to use his ability and ended up trading way down.

On Andy’s side, he was fooling around with his Grav Shift and felt like pushing it out of play instead of back toward his position. I made him choose between the Dictor and the Demo and he chose the Demo, which was probably a good move as his Dictor was out of place to brings its Overload Pulse to bear. MMJ and Boba just put out a lot of damage so that’s tough to soak up. Had he pulled the station back and managed to get two more rounds of the outpost, he would have scraped by with a second player victory due to a tie. On the other hand, he would have had to slow down a lot, which would have made for a totally different game.