Tuesday, November 27, 2018

Screed Interdictor & Rogues vs Ackbar MSU

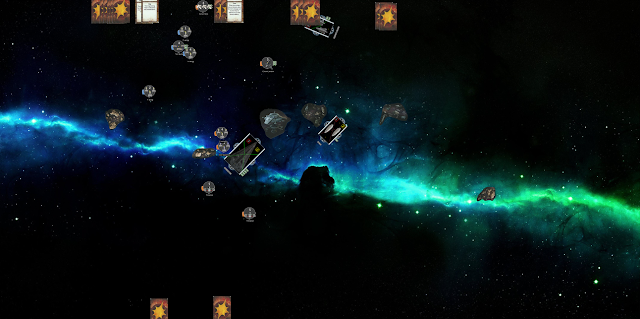
This is a quick recap. I brought my usual competitive list with a few minor changes, specifically with objectives. Andy, on the other side, brought an Ackbar MSU list that he was experimenting with. I was second and Andy chose my Station Assault. Here is the deployment:


I put Ciena on the rock and positioned my Decimators behind to be ready to finish the left most CR90 on the following turn. Here is the close of round 1:


I hit the CR90 with the Interdictor as planned. I was able to clean it up quite neatly with the Decimators and Maarek. Demo was positioned to take some serious damage on the following turn. I had no discernible plan for it. Here is the close of round 2:


Demo escaped and my Interdictor moved along, leaving the stations vulnerable. Here is the close of round 3:


My first station went down and my Rogues began to eat into the MC30s. Maarek’s speed proved to be a huge boon here. I had dropped Bossk for him and was glad of it at this point. Andy was also able to finish off the fleeing Demo. Here is the close of round 4:


The second station went down and the first MC30 popped. The second MC30 was clearly outrunning my Decimators so I went after the flotilla instead. It was not fast enough to elude Maarek Steele however. Here is the close of round 5:


The final round resulted in Maarek Steele eliminating the second MC30, giving me the (slight) win despite the loss of the stations.

My Decimators did fine work, but I lost one of them, which was a big points deficit. Maarek/Jendon were the stars and Ciena gets an honorable mention for tying up Shara and a generic A-Wing for the entirety of the game. Station Assault was not a strong objective for me, but part of that is placement. Had I placed the stations in a corner instead of in the center, I may have been able to capitalize on them a bit more. My use of Demolisher was weak. Ideally, I should have positioned it behind the Interdictor as a finisher.

On Andy’s side, he played well, concentrating his firepower and going after the objective and my weaker ship. He was one hit shy of killing Demo at the top of round 3, but forgot to add in his concentrate fire until after I had already modified his dice with Scramblers, which would have potentially changed my calculations on what to re-roll (red instead of blue crit). He had Shara and one of the generics together, which allowed me to tie them both up with Ciena. Tycho was well utilized tying up my squadrons and even managed to put a fair bit of damage on a Decimator, causing its loss to flak later. Good game.

Tuesday, November 20, 2018

Screed Interdictor & Rogues vs Sloane Victory & Quasar

I brought my favored Screed list to a showdown against Andy, who was running Sloane on board the Quasar with Squall, Brunson, Boosted Comms, Flight Controllers, and Disposable Capacitors; a Victory II with Kallus, Warlord, H9s, Gunnery Teams, Heavy Ions, and Disposable Capacitors; a pair of Gozantis (one with Goran), and a squadron ball consisting of Maarek/Jendon, Ciena, Saber, Jonus, and a Firespray. He took first and picked my Most Wanted. I made my Gozanti and his Victory the objectives. Thanks to an extra flotilla on his side, he had a slight deployment advantage. Here is the game at setup, after I had moved the center obstacles my way (to nullify his Brunson):


Turn one, I played conservatively with Demo as Andy seemed disinclined to jump his squadrons forward. I did something of an inside turn with an Engine Tech afterwards to stay close to the asteroid and close the distance to the Victory. My object was to get within long range for an HIE shot on the following turn. Unfortunately, I was just a sliver short of that. Andy spread his squadrons out to protect them. Here is the close of round 1:


Turn two, Andy activated the lead Gozanti first in order to wait me out. I activated Demo and moved up conservatively into flak range of Ciena and Saber and was able to Flechette activate both while tying Maarek up with my own Ciena. Andy moved his Quasar up at speed two, which put it into range of my HIE shot. I activated the Interdictor and took that shot before aggressively moving into close range of the Victory to pin it in place and take advantage of my Scramblers. Here is the close of turn 2:


Turn three was a painful one for me. The Victory activated first and came two damage shy of destroying Demo outright. With its second shot, it was able to pop my objective Gozanti. I was able to activate Maarek & Jendon both with my Flechettes, but the Firespray managed to land the killing blow before the turn was out. My Interdictor got the Quasar down to a single hull, but I couldn’t finish the job with squadrons because Bossk blanked out on one of the Jendon-assisted shots against Ciena, preventing my Decimators from moving in unopposed against that Quasar. Instead, I moved all three up to finish Ciena (Scatter!) and prepare to start bombing the Victory. Here is the close of round 3:


In round four, the Quasar activated and pushed some squadrons, cleaning up both Bossk and Ciena before doing some bombing on the Interdictor. It rammed itself into my flagship in order to go down in a blaze of glory. Between my Heavy Ions and Decimators + Jendon, I was able to barely finish off the Victory. My Interdictor was on a single hull remaining. Andy made a minor mistake here and activated his lead Gozanti, which then obstructed the rear one. Had the order been reversed, it is probable that the game would have ended in a mutual tabling.

I grossly underestimated the damage that the Victory could do at long range to my Demo. I considered it quite safe on the far side, but Andy showed me that this was not the case. I will not underestimate DCap Victories in the future. On the other side, my Scramblers/Brunson Combination really held the Interdictor together. If I’m counting correctly, I took 7 total damage from ramming over the course of three rounds. That helped to soften the Victory as well, but if it wasn’t for the repair commands queued up, I obviously would have gone down. In the future, I will also be more hesitant to place my flagship in such a position of no escape. 

I was quite pleased with the role that Ciena played as a replacement to IG88. Her ability to essentially ignore flak made her the ideal squadron to cover Demo. My Decimators struggled immensely against the opposing Ciena, but had Bossk performed only slightly better (not even asking for average here), that role would have been unnecessary and they could have commenced bombing operations a turn sooner.

On the other side, Andy played his squadrons conservatively and was able to keep them safe as a result, with the notable exception of Saber Squadron, who was pushed out into Bossk’s (usually) lethal reach. His use of the Victory to neutralize my Demo and Gozanti was solid. Had he turned the Quasar inward, away from the Interdictor on turn two, he would have been able to keep it out of harms way for longer. Overall, it seemed well-played and ended up being a painfully close game that could have gone either way had any number of very minor factors been different.

Saturday, November 17, 2018

Jerjerrod Dual ISD vs Sloane Quasar & Demo

For this match, I brought a list run by Viktor Tanek in the Autumn Vassal Tournament. I’ve had little practice with dual ISDs, so this was a learning experience on my end. The list had Jerjerrod on an ISD2 (on right) with Avenger, a Kuat (on left) with Devastator, Slicer Gozanti (far left), and Comms Net Gozanti (on right). On the other side, Andy brought a Sloane Quasar with Montferrat and Squall, Demo (Glad II ) with Brunson, a pair of Gozantis, and a squadron ball consisting of Maarek/Jendon, Jonus, 3 Defenders, a Tie Bomber, and a Firespray.

I had bid, took first, and chose his Station Assault. Being that he had only two combat ships, I decided to rush him for the tabling. I chose to mostly ignore the stations. Thanks to my lack of deployments, I got stuck with my Kuat on the far side, but wasn’t overly concerned thanks to my good Admiral. Here is the setup:


On turn one, I advanced, turning inward very heavily. Here is the close of round 1:


On turn two, I positioned the ISD2 to hit Demo at the top of the following round. I figured he had little chance to withstand firepower of that magnitude. The Kuat moved in to help with the flak. My Gozanti went down. Here is the close of round 2:


On turn three, I hit Demo with the ISD2 and followed it up with a ram. This action left it on a single hull remaining, thanks to Brunson cancelling my sole double hit. My plans ackwardly hinged on destroying Demo in the single shot. It was then able to unload on my flagship and make its escape. It was a Gladiator II variant with Jonus next door and I shifted EWS to the side to protect against fighters so I ended up taking some pretty significant damage. I put out some flak with the Kuat, but wasn’t able to do much more before the squadrons finished off my flagship. Here is the close of round 3:


On turn four, I was stuck ramming the Gozanti. I Darth Vadered the ECM on the Gozanti and then shot the Quasar with Devastator dice at long range. The squadrons applied quite a bit of pain. There is the close of round 4:


On turn five, I took a parting shot at the station and attempted to exit the fight. The squadrons finished me off though for a thorough tabling.

I cannot say that I played this one particularly well. During deployment, I should have kept the ISD2 toward the rear of the deployment zone and then dropped speed a bit on turn 1 in order to let the Kuat catch up. Alternatively, on turn two, I should have maneuvered for the double-arc shot at medium range on the Demo instead of driving right up into close range with only the single arc. Overconfidence was most certainly my downfall there. After failing to kill Demo with the ISD2, which (on hindsight) I had relatively small chance of doing anyway due to Brunson, I knew that the game was lost. Without Jerjerrod, I was also unable to maneuver the Kuat to make an escape, and thanks to solid Gozanti positioning on Andy’s part, I couldn’t even get in closer to the Quasar. If I had shot the closest Gozanti instead of the Quasar, it may have been a superior move, but the final outcome would have been the same.

On the other side, Andy deployed well. Placing Defenders on the left (according to the pictures) early in the deployment phase was a good choice. I had to place my Kuat on one side or the other of the ISD2. He was then able to easily reposition those speed five squadrons on the first turn. He also did a nice job of using the Gozantis to block the approach to the Quasar. At the time, I thought that he was being a bit too aggressive with Demo as second player. It may have been wise to keep it as a finisher after the fighters had softened an ISD, but it’s hard to argue with results. The double arc at the top of round 3 really sealed the fate of my flagship and then removed the possibility of a tabling when he jumped behind my formation. The squadrons were played well and the fact that they were a good number of generics limited the Kallus impact. Well played, solid game!


Friday, November 16, 2018

VASSAL Tournament Round 4: CommanderDave vs JJs Juggernaut

Round four of the Vassal Tournament was played to decide the victor of the NA East section. JJ’s list consisted of an MC75 with Bail, Ordnance Pods, and Ruthless Strategists, Yavaris, a Toryn flotilla, and an Adar/BCC flotilla. The squadrons were Corran, Dutch, Gold, Ten Numb, and 6 generic Y-Wings.

On my side, I had a heavily upgraded Interdictor (as they should be), Kallus/Flechette Demolisher, Vector/Hondo Chariot, and a Rogue ball consisting of Morna/Jendon, Bossk, IG88, and two Firesprays. I had bid, chose 1st and his Fighter Ambush (the only viable option), and here is the setup:


Turn one, I aggressively pushed my ships forward, hoping to catch some squadrons in Demo’s front arc for the following turn of flak. I also wanted to position my Interdictor to begin using The HIEs on the 75 starting on the following turn. JJ played it conservatively, pulling his fighters back. Here is the close of round 1:


Turn two, I activated Demo first and maneuvered around to catch most of the fighters in the side arc for flak. I also managed to activate Dutch and Corran. With a token, I placed IG88 in front of Demo. IG managed to tie up the bulk of his squadrons for the round. My Interdictor did it’s thing, using HIEs to chip away at the 75. The Firesprays are held in reserve. Here is the close of turn 2:


Turn three, I again activated Demo first and Flechette-activated Dutch and Corran. I used my Engine Techs, preventing me from pushing Bossk fully into the meat-grinder to soak up those squadron hits. Ouch. Bright Hope blocked my Interdictor in. The 75 rammed my Interdictor and landed on the rock. My Firesprays remained in reserve. Here is the close of round 3:


Turn four, Bail kicked in to let JJ activate the 75 first. It had a squadron command and managed to use it to finish off Demo, earning him 3 tokens in the process. He also shot the Interdictor, but it was relatively ineffectual thanks to Brunson and Scramblers. He was forced to ram and land on the rock a second time. I rammed the Toryn flotilla to death with the Interdictor. I was also able to reposition Morna to cover the Interdictor. I was hoping to finish the 75, but that pesky Gold Squadron is not actually heavy. The Firesprays finally pounced on Yavaris. Here is the close of round 4:


In turn five, I activated the Interdictor first and finished off the 75. Yavaris was able to just barely kill Morna with Gold, a Y-Wing, and a final flak shot. Bossk/Jendon finished off Dutch before Corran killed Bossk. The Firesprays finished out the round and the game by destroying Yavaris. Here is the final board state:


This was a really epic game for me. I practiced against JJs list ahead of time to see how things would go down. Because of that, I was highly confident that he would crush me in the squadron game if I went head to head. I had a rough idea ahead of time on how I would attack his fleet depending on how he deployed - which side of the MC75 that Yavaris was placed and the initial facing. The Fighter Ambush objective really helped me with deployments here. On his side, he mentioned that he hadn’t really looked at my list ahead of time, so I feel like I was going into this one well prepared. The obstacles were a bit of a help to me as well. I was able to Grav Shift them over (primarily that long, narrow one) from the center after deployment in order to guarantee the Brunson effect and to disrupt his formation.

I made a couple of key mistakes. I used Engine Techs on my Demo on turn three, which took me too far from the later squadron support of Bossk and Morna. Also in turn three, I shot the rear flotilla with the Interdictor instead of Bright Hope directly in front of me. It turned out alright, but I may have been able to knock that pesky Toryn out a round earlier than I did.

Strong positive moves included sacrificing Bossk, IG88, and Morna to strategically cover my ships. Those three squadrons did fantastic work occupying the bulk of JJs squadrons during key rounds. I also utilized Demo to solid effect with the flak. This effectively drew squadrons behind JJs formation and away from the Interdictor. Kallus/Flechettes kept Dutch and Corran out of the fight for the most important rounds.


Tuesday, November 6, 2018

Dodonna MC75 vs Jerjerrod Arquittens 

I brought an MC75, MC30, Garel’s Honor, 6 activation list with VCX token shenanigans. I’ve previously run this list against Andy with some success. This time, Andy brought a triple Arquittens Jerjerrod list. His Arquittens had TRCs, Redundant Shields, and Intel Officers. He also had a medium fighter ball of rogues consisting of Morna/Jendon and two Firesprays. I had bid and chose first player. I picked his Planetary Ion Cannons. Here is the setup:


Andy really shook things up by turning his fleet inward, which disrupted my MC30. The Hammerhead maneuverability allowed it to reposition to get in front of his fleet. Here is the close of round 1:


Turn two allowed me to position my ships to threaten all three of his Arquittens in significant ways. Here is the close of round 2:


In turn three, I activated my Hammerhead first, which was able to eliminate its target with the External Racks and a follow-up Garel’s Honor Structural Damage that I fished out using Dodonna. He activated his right most Arquittens next, which was the flagship and managed to get out of the MC30 double arc and MC75 side arc. The center Arquittens was eliminated by my MC75 front arc boosted by External Racks. Andy was able to finish my Hammerhead off with his Firesprays. He did some damage to the MC30 with an Ion Cannon shot, but nothing serious. Here is the close of round 3:


In turn four, the MC75 took an Ion Cannon shot. It had previously been softened by Morna/Jendon and things were looking a little grim for it. In turn 5, it had to take another Ion Cannon shot which was able to finish it off. His flagship escaped after the initial pass, only taking a single side arc shot from the 30. The game ended in my favor, but it was only 40 MOV difference or so. I seriously underestimated the Ion Cannon Shots and rashly charged right through.

This was another fun game. I really like this Dodonna brawler fleet. It can apply the pain during the initial clash, but seriously lacks follow-up that would allow it to finish off ships on the periphery. Keeping the Hammerhead in the rear as an emergency finisher may be situationally effective. The token farming options as second player are a nice bonus.