Tuesday, August 20, 2019

Rieekan Mon Karren & Yavaris vs Thrawn Dic & Vic

I decided to try out Auxiliary Shield Teams on an LMC80 in order to test and see how well it pairs with Yavaris as an escort and centerpiece rather than a flanker. I had Rieekan, Mon Karren, SAd, HIE, QBT, AST, and C&S on the 80; Yavaris with Flight Commander; Bright Hope with Toryn Farr; a Leia/Comms Net flotilla; and a squadron wing that consisted of Hera, Dutch, Wedge, Han, Dagger, and Ten Numb.

On the other side, Andy brought a Thrawn list with a fairly standard Interdictor with SW-7s; a Victory I with Harrow, ET, OE, APT, XI7, and Pryce (Round 3); Gozanti with Woldar and BCC; and a squadron wing that consisted of Maarek/Jendon, 2 Defenders, a Jumpmaster, and Jonus. He had bid, took first, and chose my Superior Positions. Here is the setup:


In the first round, I tokened up, added shields to the sides of Mon Karren and accelerated in order to hit the Victory on the second and third rounds before the Pryce activation. Andy kept the Vic at speed 1 to counter and pulled his squadrons into a defensive position. Here is the opening of round 2:


In the second round, Andy dropped the Vic down to speed 0. I tried to line up a double-arc shot with Mon Karren, but failed. Andy tried to keep his squadrons back, presumably to save them from getting tied down so they could help with the alpha-strike against Mon Karren. Here is the opening of round 3:


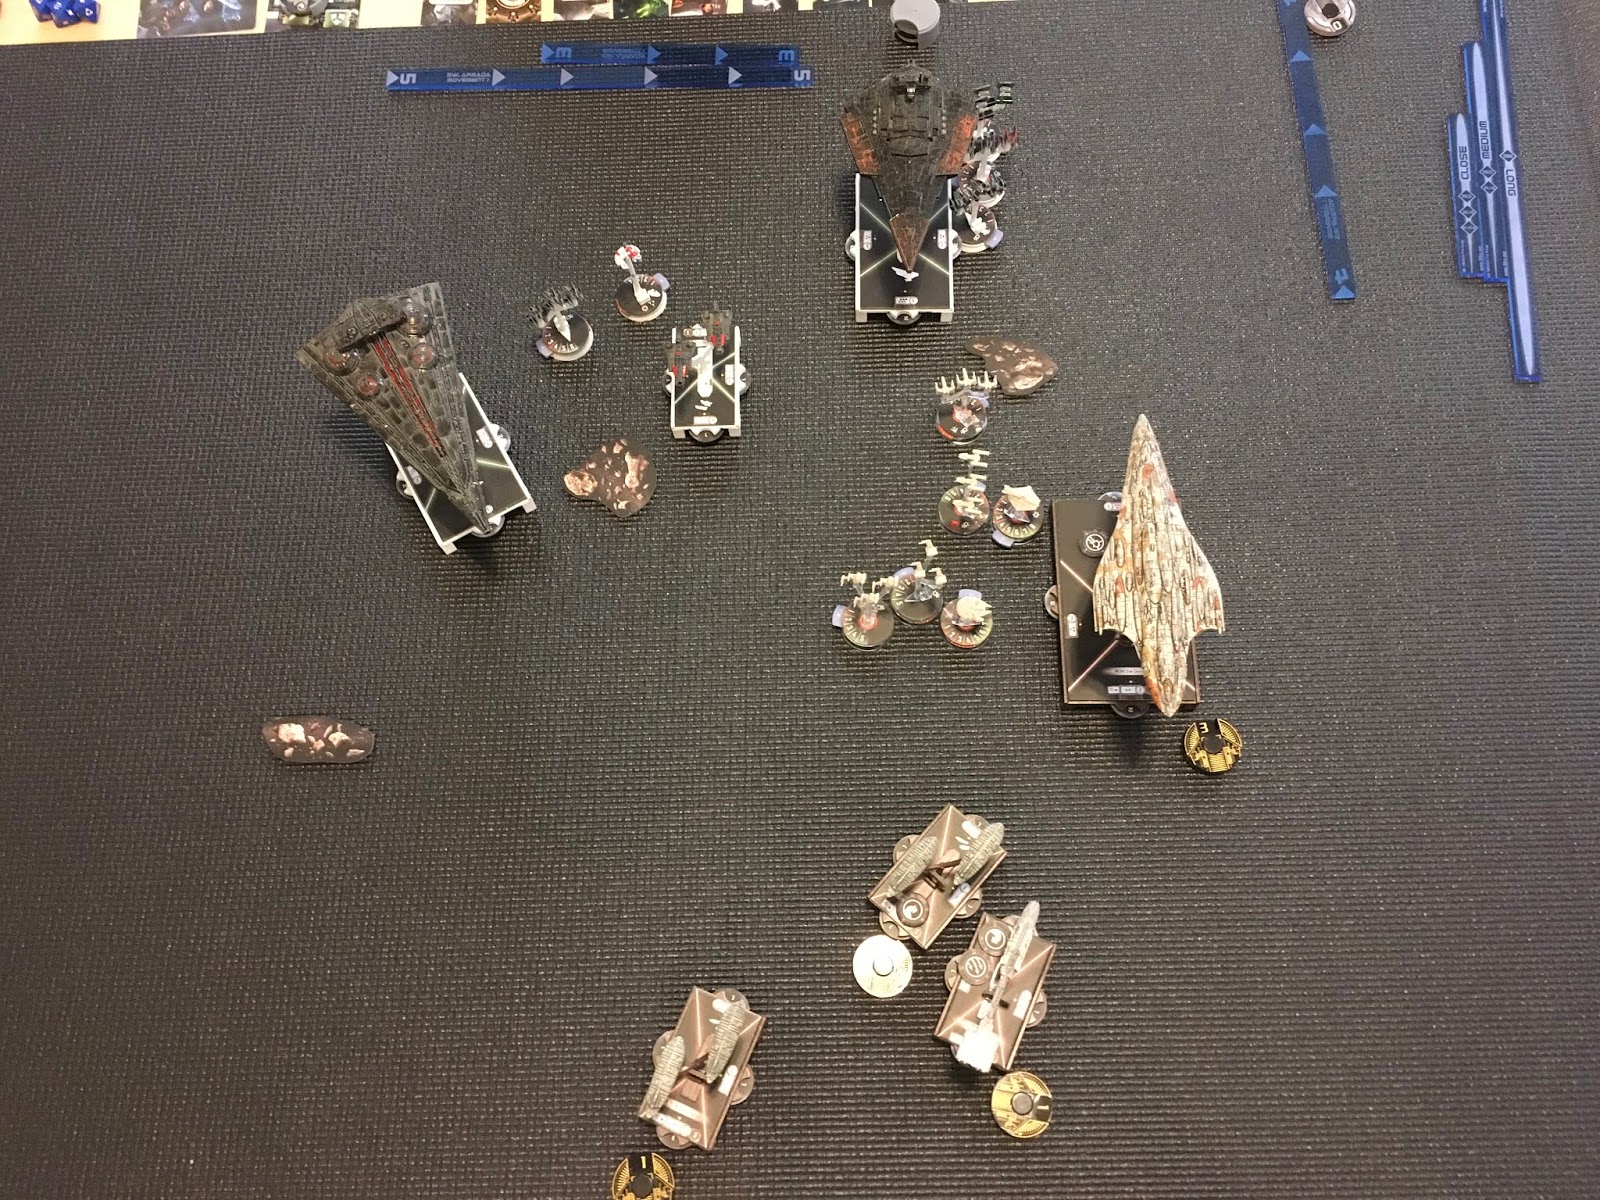
The third round was ugly for me. I had a CF Dial ready to go with the Liberty as well as a token. I rolled my 3 red and four blues and got all blanks with the reds and no crits with the blues. I used Toryn to reroll an accuracy into another accuracy and C&S to reroll my reds into a single crit. I mentally blanked on my dial and token until after the shot was resolved. So I scored very little damage on the speed 0 Victory and then in order to avoid flying off the board, I was forced to turn inward toward the Vic and land on the rock while giving him a close range double arc shot to first-last me. It was such an idiot move. I do not think I could have intentionally planned to place Mon Karren in a more favorable spot. The one bright spot was that the crit that Andy drew on the Vic was the one in which he could not resolve critical effects when attacking. That was absolutely huge. In any case, I was able to tie up some squadrons with Wedge, who sacrificed himself for the cause. Here is the opening of round 4:


In the fourth round, Han shot first and managed to finish off the second Defender and then the Victory activated along with Jonus, Maarek, and Jendon in order to try to take down Mon Karren. It managed to survive with a single hull after the ram. Yavaris and Mon Karren teamed up to finish off the Victory. I managed to tie up Andy’s squads again and I repositioned Dagger and Ten Numb to greet the Interdictor after they put in the killing shots on the Vic. We ended up calling it at that point as it was clear that Mon Karren would escape and I’d be able to finish off Andy’s squadrons. Here is the closing board state:

This was a solid win for my side, but it should not have been. The lucky critical against the Victory prevented multiple APT triggers. I also just plain played Mon Karren poorly and deserved to lose it. The inclusion of AST on Mon Karren was good, but I think that it is better suited to a true long-ranged variant. I may try that next time. Dagger and Ten Numb were slow to join the fight, but that was partly my own fault for charging Mon Karren forward in such haste. On the other side, I believe Andy should have set Pryce for round 2 instead of 3. Other than this, he had a bit of bad luck that prevented his win.

Sunday, August 18, 2019

VASSAL Fleet Exercise Round 4: Dave vs Biggs

After the third round of this tournament, I strangely thought we were done. I even deleted my list from my list builder. So, when I get paired on round four, it was a bit of a surprise. I was paired with Biggs, who was running a variant of the recent GenCon-winning list. He was running an Assault Frigate with Toryn and Flight Controllers, a Pelta with Asoka and IF!, LMC80 with Engine Techs, and had Garm safely tucked away on a CR90. His squadrons were 4 A-Wings, a Y-Wing, and Gold Squadron. I picked Contested Outpost, though Advanced Gunnery looked quite nice as well for my Kuat. Here is the setup:


In the first round, I jumped up to speed three on the Kuat without committing to either the Liberty or the Pelta/Frigate. Biggs stuck Gold Squadron out a little far and my squadrons happily took the bait and killed it. I’m not sure if he was trying to draw me toward that side of the battlefield, but I kept the Firesprays in reserve to be used against the Liberty. Here is the opening of round 2:


In the second round, I pushed Ciena into the A-Wing meat-grinder in order to tie them up. She went down and I sent an Aggressor to take her place. The Liberty moved in to flank the Kuat on the Pryce round. I agonized over which way to go with the Kuat until I finally decided to do attempt a speed two inside turn against the Liberty. Sadly, I failed to get my front arc into close range against the side. Here is the opening of round 3:


The third turn was the big one. I hit the Liberty with my Kuat (despite missing the close range front arc shot) and was able to wear it down quite a bit for my Firesprays. I also turned in against the Pelta/Frigate to do work on that side of the battlefield. I lost an Aggressor and sent IG88 in. Here is the opening of round 4:


In the fourth round, I activated my Kuat first and rolled a single hit against the Pelta. Thankfully, Screed gave me a hit/crit and that was just enough to bring it down. From the front arc, I laid into the Frigate with a mediocre roll and then blocked it in to prevent escape. The Liberty had the face-up that prevented attack against an obstructed target, so he waited to activate. I had a squadron command with the Gozanti, but failed to bring down the Liberty with the side shot and the two Firesprays, missing my statistically expected 4 damage. The Liberty was then able to shoot the Raider and managed to pop it, despite Brunson’s best efforts. Biggs then clipped an asteroid for the last remaining hull point. Here is the opening of round 5:


In the fifth round, I opened it up with a full frontal shot from the Kuat that resulted in a dead Assault Frigate. My side shot managed a very strong showing that knocked the CR90 down to a single hull. We called the game at this point as the Kuat was still going strong and my squads would have been able to handily finish the CR90. Very good game. Mistakes were made on both sides, but it was a fun one.

Here is what worked on my end: The Kuat with Screed, Pryce, FCT, HIE, and ACM. This setup let me set up for a really good hit on the Liberty at the start of round 3. Even though I missed the close range front arc shot, HIE still helped my medium range shot do serious work. It should be noted that I never got the magic HIE/ACM shot to trigger. My rolls just never allowed it. That said, I did use FCT to trigger ACM/Standard Crit and HIE/Standard Crit, which was rather nice. Of my squadrons, Ciena, IG88, and the Firesprays did very well for me. My strategy of indecision worked very well. I was able to soften the Liberty without being totally out of the fight. I managed to keep the Kuat in play the whole way through.

Here is what didn’t work all that well: My poor Raider helped to soften the Pelta, which was nice, but I used it mostly for area denial and 65 points is a heavy investment for something that pretty reliably pops from a single Liberty shot. Throughout the tournament, I felt like the Raider just didn’t contribute as it ought (probably my fault). Similarly, the Aggressors underperformed for their points. While four blue dice is nice, without rerolls, they generally had poor results and having only 5 hull made them a little squishy.

Tuesday, August 13, 2019

Rieekan Nebulons vs Raddus MC75

On my side of the table, I brought Rieekan on an MC30 with Admo, Lando, OE, APT, and H9; a Nebulon with Salvation, SFO, QBT, and the new Auxiliary Shield Teams; another Nebulon with Vanguard, C&S, SFO, QBT, and AST; a pair of Comms Net flotillas; and Hera, Dutch, Wedge, and Dash for a squadron component.

On the other side, Andy brought a Raddus list with an MC75 Profundity w/ an MS-1 CR90 in waiting; a pair of ET-TRC90s, one of which had Raddus and Lando on board; Quantum Storm with Slicers; and Shara & Tycho for the squads. I chose second player and he picked my Contested Outpost. Here is the setup:


In the first round, I slow-rolled it toward the station. I had to bump Vanguard (on right) up to speed 2 in order to ensure that I claim the station. I should have used a GR75 for that. I forgot to grab a post drop picture, but the MC75 drops on the far right with the CR90b double-arcing Vanguard. Here is the pre-drop opening of round 2:


In the second round, Andy managed to neutralize Vanguard after it moved into the front arc of the MC75. He had to ram it to finish it off. Salvation and Vanguard did some mean damage to the MC75 on the approach, though the MS-1s exhausted C&S. Also, lots of double-ram damage against my flotillas. Tycho went down to my squadrons. Here is the opening of round 3:


In the third round, Andy was able to finish off my GR75s, I killed Quantum Storm after he sliced Salvation, and Shara went down, despite her potent counter-fire. Here is the opening of round 4:


In the fourth round, Andy activated the MC75 first and failed to finish off Salvation. He was able to move out of close range from Admonition however. I lined my rather hurting squadrons up for some bombing on the MC75. Here is the opening of round 5:


In the fifth round, I lost Salvation and my rogue bombers finished off the MC75. Andy turned his CR90B inward to loop around and try to claim the station on round 6. My rogue bombers managed to punish this maneuver and finish off it off as well in the final moments of the game. Thanks to my Contested Outpost points and the last CR90 kill, I was able to salvage the game and take the Pyrrhic victory.

I made a number of key mistakes. I should have used a GR75 to claim the station on the first turn rather than increasing my speed on Vanguard. The speed increase negated my QBTs and put me out of position. It also would have been wise to activate Salvation before Vanguard on turn 2. I wanted to keep Salvation at long range, but I allowed Andy to use his black dice and to ram Vanguard. Had I kept it for last, it most certainly would have survived into the third round.

On the bright side, I kept Admonition and the squadron ball in reserve. The squadron ball did fantastic work in the end game. Also, Salvation punched well above its weight. It managed a seven damage hit at long range, and a six damage hit after being sliced a second time. Andy was not expecting firepower of that magnitude from a Nebulon. The Auxiliary Shield Techs were nice, and for three points each, well worth it, especially with Vanguard and it’s redirect.

On the other side, Andy did work with his engine techs. I pulled Reinforced Blast Doors from Admonition last minute. That was a mistake as I was very concerned about a quad ram from a first-lasting CR90 against Admo. The drop was blunt and predictable, but did the job. Had he run a pair of generic A-Wings along with Shara and Tycho, my squadrons would have been completely neutralized and I wouldn’t have had finishers to knock out the MC75. He also would have taken the victory if he hadn’t looped inward with the CR90b, which had significant shield damage.

Overall, a tense, close game. Good stuff.


Wednesday, August 7, 2019

Sloane Harrow & Corvus vs Garm MC80

In this casual game, I decided to try out a couple new cards. I brought a Vic 1 with Sloane, Harrow, ET, QBT, OE, APT, and the new Expert Shield Tech; a Raider 1 with Corvus, Isen, ExRacks, and OE; a Typical Squall type Quasar, and a Defender-heavy squadron ball. On the other side, Andy brought a Garm Home One, Pelta with IF!, a pair of Slaved Turret Hammerheads, Repair Crew flotilla, and 4 Z95s. I took first and picked his Ion Cannon (a bad move). Here is the setup:


In the first round, I banked nav tokens and prepared to hit Andy’s Pelta and Hammerheads on he following round. Here is the opening of round 2:


In the second round, I swept away Andy’s meager squadron cover, but failed to make much headway against the ships. My Victory began to take long-range damage, which stripped the shields in short order. I stuck my Raider in front of the MC80, not necessarily to pin it in place, but because it’s a nice safe spot (so I thought). Here is the opening of round 3:


In the third round, I activated the Quasar first. I was hoping to put enough damage into the Pelta to remove it before it could fire. I rather forgot that I had dropped Maarek Steele in favor of Whisper in order to try that out. I barely scratched it and Andy dropped the Raider with just the right roll in conjunction with a CF dial. I next activated the Victory, which had a double arc shot on the Pelta, but the Pelta survived again with a single hull. Andy activated the rest of his fleet and dropped the Victory while also damaging the Quasar. Here is the opening of round 4:


In the fourth round, the Ion Cannon was able to knock out the Quasar before any activations. We didn’t play it out, but Whisper was able to score a damage on the Pelta to finish it off. A crushing defeat for the Empire. Andy set up a really nice kill-box in the center, which I boldly flew into in my haste to get down to a fight. The Harrow title with ETs did little to benefit me this game. The Corvus title let me reposition to block in the MC80, which was a neat trick, but it did not gain me much. I pretty well lost this one on objective choice and deployment.


Lessons Learned:

- Don’t fly into a kill-box.

- Sloane without Maarek Steele delivers subpar results.

- Hammerhead and Pelta long range damage adds up fast!