Monday, September 30, 2019

Rieekan Defiance vs JJ Dual ISD

In this match, I brought a Rieekan list with an MC80 Command variant with Defiance Title, ECM, Strategic Advisor, Hardened Bulkheads, ET, HIE, LTT; an MC30 with Expert Shield Tech, OE, ACM, RBD; Quantum Storm with Ezra and Slicer Tools; a Comms Net flotilla; and a squadron ball of Shara, Tycho, Lando, and Dash. On the other side, Andy brought a Cymoon, BT Avenger Kuat, and Comms Net Gozanti. His squadrons consisted of Ciena, Valen, Jonus, and a standard TIE. He had JJ and the new Take Evasive Action, allowing his ISDs to do really crazy turns (2-2-2 at speed three). Andy took first, picked my Solar Corona, and deployed. I set up my fleet to focus on the Cymoon (on right). Here is the start of the first round:


In the first round, I moved up with the MC80 and brought the MC30 in behind to support it. Here is the opening of the round 2:


In the second round, I sliced the Cymoon but had to burn my scatter token. I also positioned my MC30 to try to catch an ISD at close range if Andy tried to close with my flagship. I was able to procure an HIE hit on the Cymoon and to knock out Ciena with my squadrons. Here is the opening of round 3:


In the third round, I lost Quantum Storm on the left and Andy dropped to speed zero on the Cymoon in an attempt to avoid a close range shot from my MC30. I hit fairly hard with the MC80 and dropped the Cymoon down to something like 5 hull remaining. I then pushed the MC30 up to speed 4 in order to avoid the Cymoon front arc. This proved unnecessary as Dash and Lando were able to score th requisite damage to finish the Cymoon flagship off. We called it just after that as my ships were far out of position to chase Andy’s Kuat and he was disinclined to pursue my ships. 

Link Turbolaser Towers proved to be quite valuable once again. The star of the game was the Lando squadron. Scoring a guaranteed 2-3 damage is immensely valuable as a finisher. He may be my new favorite squadron, perhaps even topping Morna Kee, who fills a similar role.

Monday, September 23, 2019

Thrawn Victory & Demo vs Raddus Profundity


For this match, I brought a list with a number of the new upgrades. I had a Victory 1 with Thrawn, Harrow/ET, Tua/ECM, OE, APT, and Linked Turbolaser Towers; Demo with Brunson, ET, OE, APT; an Arquittens with LTT and Expert Shield Techs; a Comms Net Gozanti; and Soontir, Ciena, Dengar, and Mauler. On the other side, Andy brought a Raddus list with an MC75 Profundity with a Cham/Garels Honor Hammerhead tucked inside. Not only that, but he also had 3 B-Wings stored away in the Rapid Launch Bays. I took first and tried out his Surprise Attack. Here is the opening of round 1:


The first round involved some minor positioning. I spread my squadrons out to cause problems for the turn 2 drop. In the second round, I was able to put some decent damage into the MC75 with red dice from the Victory and Arquittens as well as a Demo strike. The Hammerhead put some damage through on the Arquittens. Here is the opening of round 3:


The third round was a bit of a bloodbath with Demo and the Arquittens both going down as well as the MC75. My squadrons continued to plug away at Andy’s squadrons. I lost Soontir in exchange for a pair of B-Wings. Here is the opening of round 5:


In the fifth and final round, I was able to score just enough damage on the Hammerhead to finish it off with the Victory at long range. We called it at that point. It ended up being a close game with a slight victory to me. I was really hoping that the Surprise Attack objective would be a strong alternative to Most Wanted, but for my particular list, it had a negligible effect. Having the Comms Net Gozanti proved to be highly advantageous in countering the effects of the raid tokens. Harrow at speed 1 on top of the station was really not that vulnerable with Demo and an Arquittens on its flanks.

Harrow is a fantastic title and combined with Tua/ECM, makes the Vic1 truly formidable. Linked Turbolaser Towers is an excellent upgrade on both the Victory and Arquittens. It will be a go-to upgrade in the future. Expert Shield Tech is also a really great upgrade on low-shield ships like he Arquittens. It puts the redirect tokens to great use even after the shields are stripped.

Sunday, September 22, 2019

Casual Tournament with Screed Kuat & Decimators

I made it out to a local event for the first time in quite a while, which was great. I had yet to even see the SSD in person and I was hoping to face one on the table. This was a two game tournament, which is a convenient Sunday format. I brought a Kuat with Screed, Pryce, OE, ECM, HIE, ExRacks; Raider 2 with Brunson, HIE, and DCaps; Comms Net Gozanti; and my current favorite squadron ball consisting of Mauler, Dengar, Morna, and three Decimators.

My first game was against Dan, who was running a Dual ISD list. It had a nasty ACM Kuat (on left) and a Rapid Launch Bay ISD1 (on right) with Morna, Maarek, Jendon, and Boba inside. I had the bid and picked first player and his Dangerous Territory. I deployed my Kuat and Raider aggressively at speed three. Here is the opening of round 1:


The first round started with a bang. Both of us moved aggressively to the middle. My Raider lined up for a double arc and my Decimators were able to hit the Kuat. I figured I would attack both of the ISDs head on and try to drop the Kuat fast and win the damage race. Here is the opening of round 2:


The second round saw the destruction of Dan’s Kuat. My Raider stripped the shields, he moved in close to my Kuat, allowing me to hit him with my front arc, and then my Decimators finished the job. He dropped his squadrons with RLBs, but they were too far away to shoot. Here is the opening of round 3:


In the third round, I had the double arc on the ISD1 and was able to move out of his front arc. He activated and attacked my Kuat with his squadrons, but was unable to do the requisite damage. My Decimators then finished off the limping ISD1. This gave me a solid first game win from a pretty ideal matchup.

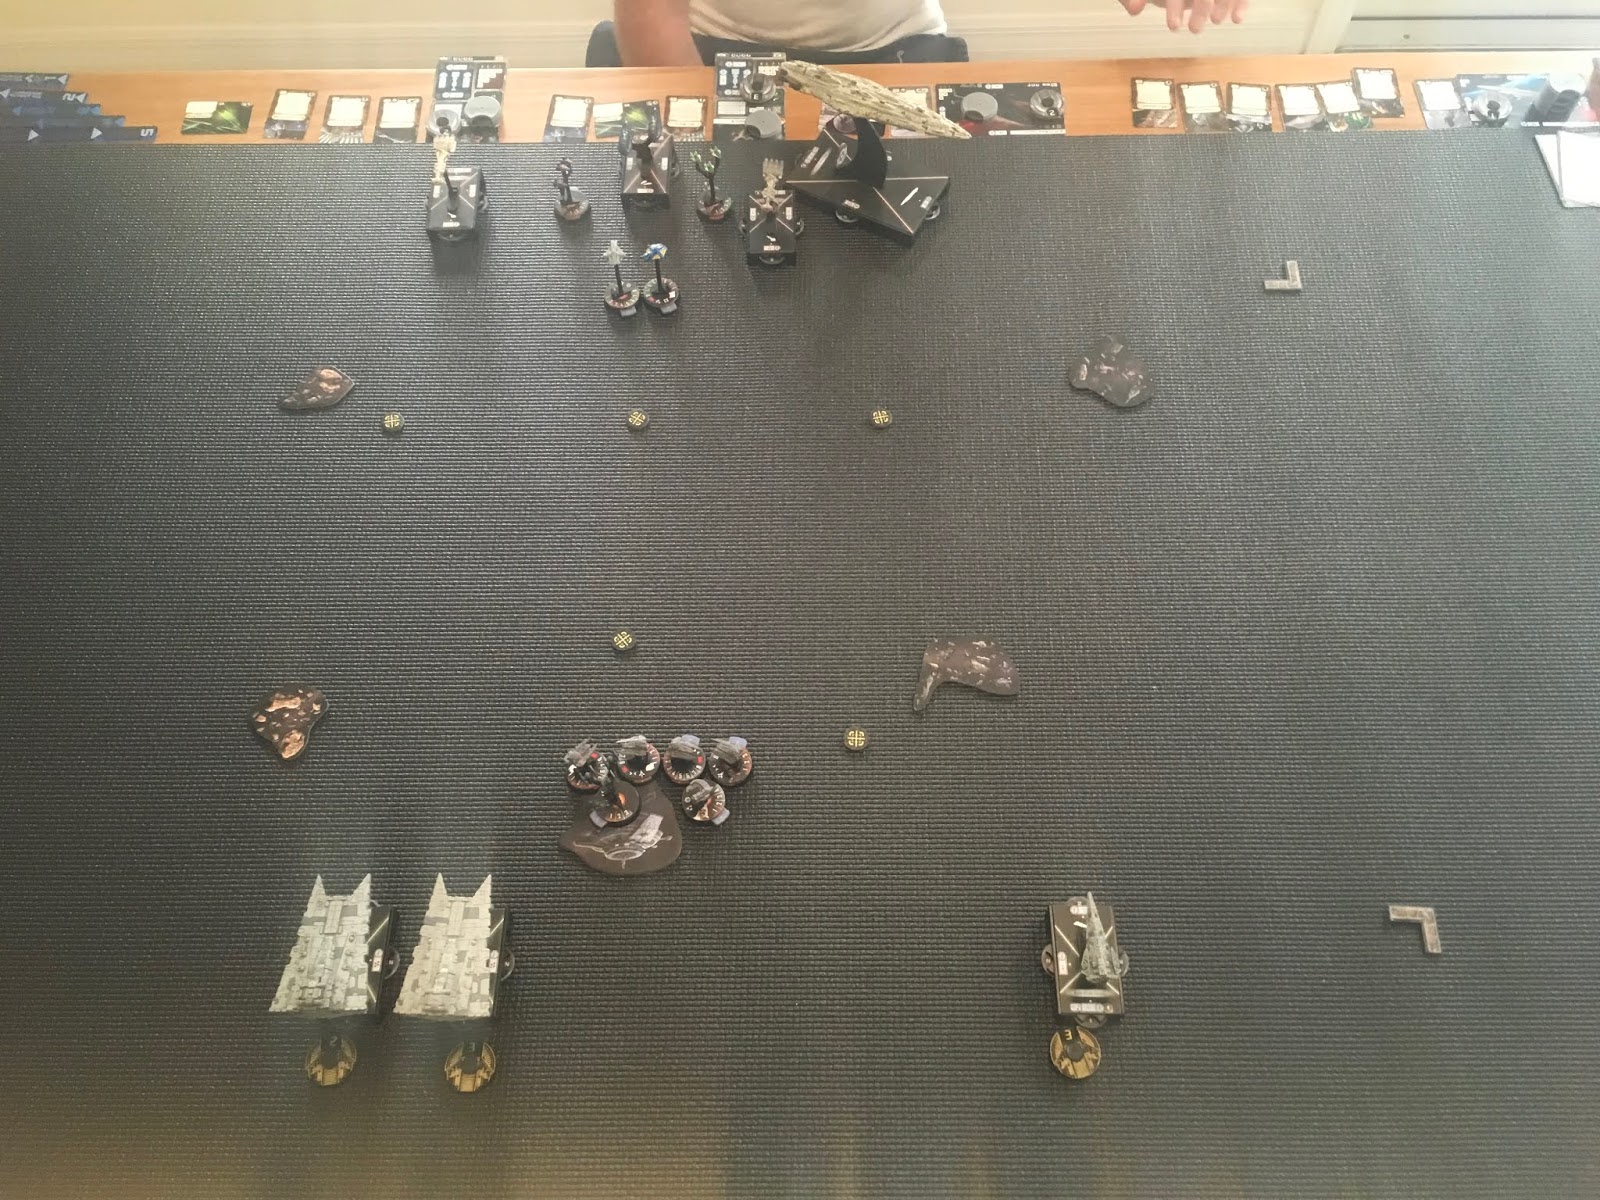
In game 2, I was paired with Maxwell, who was running a Jerjerrod SSD with Ravager, DCO, Krennic, Palpatine, QTC, Enhanced Armament, QLT, HIE, Point Defense, and Gunnery Teams. His squadrons were Morna, Decimator, and a pair of TIEs. We tied for bid and rolled for it. I won, took first, and picked his Fire Lanes objective. Normally that’s a really bad choice, but I was hoping to drop the SSD for full points and contest some tokens with the Kuat while doing it. In the first round I jumped the Kuat into a nice double arc position. The squadrons all came together and fought it out. Here is the opening of round 2:


In the second round, I activated the Kuat first and stripped the shields from the front three zones (without the use of HIEs). Maxwell used a Jerry maneuver to ram the Kuat and stay in place to keep control of the objective tokens. I destroyed the two TIEs and a Decimator for the loss of one of my Decimators. In the third round, I continued to inflict significant damage to the side of the SSD with the Kuat while also ramming to stay in place. My squadrons finished off his Morna and began to lay into the SSD. Here is the opening of round 4:


In the fourth round, I activated the Kuat first and finished off the SSD before it could activate. This gave me a strong win, despite the Fire Lane Token disparity, and a win overall for the tournament. 

My list performed well. The first matchup was highly favorable for me as my Raider and Kuat do very well against larges. Dan was certainly prepared for the SSD, but no so much for a Decimator ball. He made the mistake of setting his Pryce for round 3 while mine was set for round 2. We talked about it after and he didn’t anticipate me positioning my Kuat so aggressively. By placing my Kuat so far out on turn one, I was able to force him to close with me on turn two. This gave me very favorable shots and my Heavy Ions made short work of the shields on both ISDs.

Against Maxwell, the SSD flak gave me some trouble, but the Decimators were able to take it and carry on for the most part. Having first as well as deployment advantage let me place the Kuat ideally for a first/last maneuver and avoid his exceedingly nasty front arc altogether. I also wanted to close quickly to minimize the Krennic effect. I had the double arc on turns 2-4. He intentionally rammed the Kuat twice in order to stay in place for those tokens. That may have been a bad move. Had he managed to get a double arc with his two sides, the Kuat would have been in a lot more trouble. Had Maxwell included an Intel Officer, he would have been able to minimize the effectiveness of my brace, which would likely have had an effect. In any case, it was a good game and it was a lot of fun fighting the SSD.

Tuesday, September 17, 2019

Jerjerrod ISD2 & Decimators vs Vader Dual ISDs

In this match, I brought an ISD2 with Jerjerrod, Kallus, QLT, GT, SW7, ECM, and the new Linked Turbolaser Tower; an Arquittens with Needa and TRC; Comms Net Gozanti; and a squadron ball of Mauler, Dengar, Morna, and 3 Decimators. On the other side, Andy brought a Vader Cymoon (on left) and Kuat (on right); a Comms Net Gozanti; and 4 TIE Fighters. Andy had the bid, took first, and selected my Fighter Ambush. I was able to position my Decimators to try to hit the Kuat on the first round, but only two of them were able to get into range. One of the TIEs went down. Here is the opening of round 2:


In the second round, I used Jerjerrod to keep my distance with my ISD2. Andy was able to get his Kuat in close to the Arquittens. Little hope for that one. My Decimators went to work on the Kuat. Here is the opening of round 3:


In the third round, the Arquittens went down. My Decimators were able to finish off the Kuat. Here is the opening of round 4:


In the fourth round, my Gozanti survived a long range Cymoon shot. I was able to take down the opposing Gozanti and I stripped most of the shields from the Cymoon. Here is the opening of round 5:


In the fifth and sixth rounds, I continued to hammer the Cymoon with the Decimators, but it just barely survived. Nevertheless, I earned a fairly sizable stack of fighter ambush tokens. This gave me substantial win. This was another tough matchup for Andy as rogues do very good work against Dual ISD lists. It was also pretty well decided when I declined a head-on engagement between my ISD and the two of Andy’s.

Tuesday, September 10, 2019

Screed MSU & Decimators vs Ackbar MC80

In this game, I brought Screed on Insidious with ET, OE, APT, Tua, and ECM; Demo with ET, OE, Kallus, and Flechettes; Corvus with Brunson, DCaps, and HIE; and a Decimator ball with Mauler and Dengar. On the other side, Andy brought Ackbar on Defiance, a pair TRC90s with Intel Officers and FCTs, a Comms Net flotilla, Shara/Tycho, and a pair of VCXs. 

Andy had the bid and took second in order to play his objectives. I picked Intel Sweep. Andy’s objective ship is the far left CR90. On my side, I placed Corvus first in the center in order to drop the Decimators there. I then placed my Gladiators with Insidious as my objective ship on the outside and Demo on the inside. I was hoping to fight on the left side, but Andy placed his flagship on the right, forcing me to do some repositioning. Corvus was able to redeploy more favorably afterwards. Here is the opening of round 1:


In the first round, I gathered tokens and set Demo up for a turn 2 pounce on Andy’s objective ship. Insidious turned to move toward the MC80, but I sort of blocked myself inwith Demo and ended up moving more conservatively than I otherwise would have. I managed to position Morna and a Decimator within striking range of that objective ship. Here is the opening of round 2:


In the second round, I activated Demo first and had the requisite squadron command lined up. I sent a Decimator and Morna to soften things up and then followed it up with a Demo shot. This left the CR90 on a single hull and almost no shields. I just barely missed taking it out. Another Decimator shot in the squadron phase took care of that. My Raider started to soften up Defiance, which surprisingly turned inward for the Ackbar slash attempt. Here is the opening of round 3:


In the third round, I started activated the Raider first to prevent the Ackbar slash and give Andy a tough choice on who to shoot. This let me use Heavy Ions a second time to strip more shields. I brought Insidious in closer to pick up a second objective token. The MC80 was able to ram Insidious, go back, ram Corvus, and then end up in the same starting position. This put it just out of close range of Insidious. Mauler and Demo did work against the opposing squadron ball. Morna and a Decimator began to reposition, and my other two Decimators laid into the MC80, which was going down fast thanks to the HIE softening. Here is the opening of round 4:


In the fourth round, I managed to get Demo and Corvus out of danger and get Insidious into close range of the MC80. Because the 80 was very close to dead, I had the squadron game pretty well wrapped up — despite losing Dengar, and Insidious was ready to hit the MC80 and move away, we called it at that. It was a rough match for Andy. It was a tie on the objective tokens and I killed or would have killed enough of Andy’s fleet to score at least a 9-2. The Corvus title proved absolutely phenomenal in this match. It really enabled me to wear Defiance down with the Heavy Ions backed with Decimators. Insidious did little in the match, functioning as a heavy threat and finisher. Demo was essential in knocking out the CR90 objective ship early and then using Flechettes to keep Tycho out of action for two rounds. I’m relatively happy with this fleet composition, but the Corvus title really makes it sting in my opinion. I’ve struggled with Raider IIs in the past, and my opinion of them his dramatically improved with this new inclusion.

Thursday, September 5, 2019

JJ Victory & Demo vs Screed Cymoon & Kuat

In this match, I brought Jerjerrod on a Vic 1 with Warlord, H9s, Tua, ECM, OEs and ExRacks; Demo with Brunson, OEs, and APTs; a Raider with Flechettes, OEs, Iden, and Corvus; Morna, Mauler, Dengar, and 3 Decimators. On the other side, Andy brought a Cymoon (on left) and Kuat with Fire Control, HIEs, and ACMs. In support, he had a Gozanti and a light squadron presence. I had a 3 point bid, chose first, and took Contested Outpost. Here is the deployment:


In the first round, I moved the Victory and Demo in to threaten the Kuat while Andy turned the Cymoon the opposite direction with the intent of popping the Raider. He had ‘Take Evasive Action’ on the Cymoon and was planning to wheel the Cymoon back around again toward the Victory with the extra click. Morna managed an early shot on the Kuat. Otherwise, no action. Here is the opening of round 2:


In the second round, I positioned the Victory to hopefully get a double-arc on the Kuat while also leaving an escape route open. My Decimators really got to work in the damage race. The Raider was able to stay out of range of the Cymoon thanks to JJ, but it was mostly out of the battle as well. The Kuat activated after all my ships, scored a HIE shot on the Victory and moved in to be ready for the kill-shot. It wasn’t able to avoid the double-arc. Here is the opening of round three:


The third round opened with me destroying the Kuat with the Victory. Thanks to External Racks and the softening effect of the Decimators, I scored the exact amount of damage to finish it off before it could activate and kill my flagship. The Decimators switched over to the Cymoon. In the fourth round, Demo was even able to soften up the Cymoon further with an APT shot to the rear. Mauler and Dengar were able to wear down his squadrons. Here is the opening of round 5:


In the fifth round, the Decimators continued to fire into the Cymoon, taking it down as it fled. This game was over fast. Decimators (or any bomber-heavy fleet) tend to make short work of Dual ISD lists. My Victory put in some very good work with the black dice on this one. That first player activation really gave me a huge advantage in the brawl between the Victory and Kuat. I don’t often run Jerjerrod either, but he did very fine work in this one. The Victory was able to do just the right maneuver to position for a double arc on the Kuat after it moved and Demo was able to get into the fight against the Cymoon before it could escape.

Had Andy slowed the Kuat to speed 1 in the first turn and sped the Cymoon up to speed 3, turning toward the primary threats, I think things would not have gone as well for me.