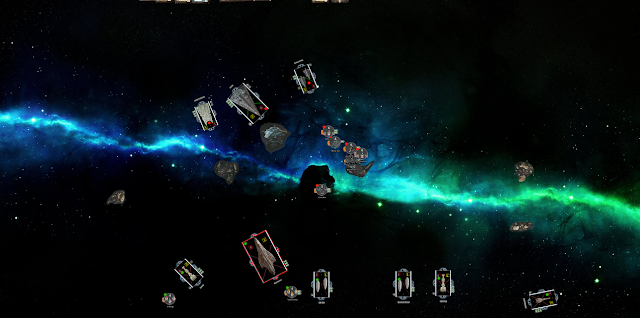
This was the first round of the World Cup Elimination Tournament and my opponent, NebulonB, had a Raddus list consisting of a Libery type MC80 with Mon Karren, Intel Officer, XI7, Spinals, SW7s, and Engine Techs. In support of his assassination machine, he had a pair of CR90Bs, Quantum Storm Slicers flotilla, Comms Net flotilla, and a Hammerhead lifeboat. He picked my Most Wanted (of course) and deployed way back at speed one, which I was rather surprised by. Here is the setup with Demo opposite his Most Wanted CR90:
In the first round, we collected tokens and positioned our fleets in preparation for his Raddus drop. I knew that Mon Karren could potentially first-last my Interdictor if he wanted and was most concerned with preserving that asset, so I took up a position on the station in case of ramming shenanigans. I kept Demo close in order to pounce on the MK, but should have kept it further to the rear of the Dictor. Neb kept his squadrons far back in reserve, which was wise. I moved my squadrons more to the left as I was unsure of the location of the Raddus drop and wanted to threaten his left-most CR90 if he decided to move up more quickly. Here is the opening of round 2 right after the Liberty dropped in:
In the second round, my Demo and Interdictor were out of range and he was able to wait me out. I considered jumping Demo forward to hit the Mon Karren (and should have), but I decided to use the asteroid as a potential obstruction and to really punish him if he elected to ram Demo as a finishing move. Unfortunately, he was able to hit my front arc and crawl forward into medium range while maintaining an unobstructed front arc shot. Because my Rogues were out of position, only Maarek was able to put any damage on the MK. I blundered in positioning here and misjudged distance for Jendon. I turned my Gozanti slightly toward the left (should have gone straight) and this put Jendon out of activation range for the next round and also put the Goz on a ramming course toward that asteroid. This was the game-deciding blunder on my part. The Liberty managed to shave off two shields and the evade token from Demo. His CR90s played it VERY safe. Here is the opening board state on turn 3:
In the third round, the Mon Karren activated first and managed to kill Demo in a single shot with a very solid roll. He then jumped to an effective speed four in order to flee the scene of the murder. I turned my Interdictor toward the right and my Gozanti toward that looming asteroid, which seemed to draw it in like magnetism. I forgot to take my squad token here, which hurt big time on the next turn. Morna and Boba finally managed to get into range for a turn, but Tycho kept them away from the front, which is where I really wanted to be. In conjunction with my long range HIE shot, I worked Mon Karren down to 5 hull, but my generic Firespray was too far away and my Maarek/Jendon positioning blunder kept the damage to a minimum. Here is the opening of round 4:
In the fourth round, Neb activated his Slicer Storm first (really smart move) in order to give my Gozanti a repair command. My Dictor destroyed the Comms Net flotilla and dropped the Slicer Storm down to a single hull after my ram. My squadrons cleaned up Tycho and the A Wing, but this one round of delay had a huge impact. Neb did a great job keeping his meager squadrons in the game into the fourth round. Here is the opening of round 5:
In the fifth round, the CR90 double-rammed my Gozanti to finish it off (thanks to me driving over my own asteroid). I cleaned up his CR90, but had to use Jendon’s activation to do it in the squadron phase, which prevented me from getting Maarek and Jendon on target for a final run on the Mon Karren. I also finished Slicer Storm. Neb self-rammed with the CR90 to keep it away from my squadrons. Here is the opening of the final round:
The sixth turn involved Neb activating his Hammerhead to wait out my Dictor. The Rogues hit Mon Karren, but couldn’t quite finish it off on their own. Another round certainly would have done it. Alas, here is the final board state:
Biggs from Steel Command was absolutely correct that this game was mine to lose. NebulonB played expertly and did the exact right thing: hit the Demo and scatter. Nevertheless, I have a very solid anti-Raddus solution and with a minimization of my blunders, should be able to perform far better in the future. On the positive side, as with all of my losses, it was a fantastic learning experience and is really going to up my game going forward, so big thanks to NebulonB for a great game! A formidable opponent and I wish him well in the next match.
Lessons Learned:
- Be very careful to keep Jendon in range of the Gozanti. I’m strongly considering moving some things around in order to fit Boosted Comms on the Gozanti in order to really give me battlefield flexibility.
- With a speed one Gozanti, plan several moves in advance in order to minimize the risk of smashing into asteroids.
- Against Raddus, generally keep the Demo back in reserve if practicable.
- If the Raddus player drops on the Demo, don’t be afraid to pounce on it in order to do a bit of damage. A determined Raddus player absolutely will be able to kill Demo with a well-positioned first/last.


No comments:
Post a Comment
Note: Only a member of this blog may post a comment.