I brought a Sato list for trial against my usual Armada partner, Andy. It consisted of an Ordnance Cruiser with Wide Area Barrage, Intel Officer, ECM, OEs, and ExRacks; Admonition flagshipship with Intel Officer, OEs, APTs, and Spinals; a Leia Comms Net GR75; and for the squadrons: Tycho, Han, Hera, Dutch, Wedge, and Rogue Squadron.
On the other side, Andy brought a Thrawn 2-Activation Fleet with a Kuat and a Quasar (with Pryce). For squadrons, he had Maarek/Jendon, Mauler, Jumpmaster, Gamma, Jonus, and a pair of Firesprays. He had the bid, took first player, and chose my Solar Corona. He set up in the corner, facing inward with the Kuat on the outside, which was a solid position. I place somewhat across from him with the intent of moving forward at max speed to catch the Quasar in the second round right after it used Pryce. Learning from my previous game against this list, I was prioritizing that Quasar. Here is the setup:

In the first turn, I moved my fleet forward at speed three. I had mostly Rogues, so I wanted to have them available to hit his squadron ball after he hit my MC75. Here is the opening of turn 2:

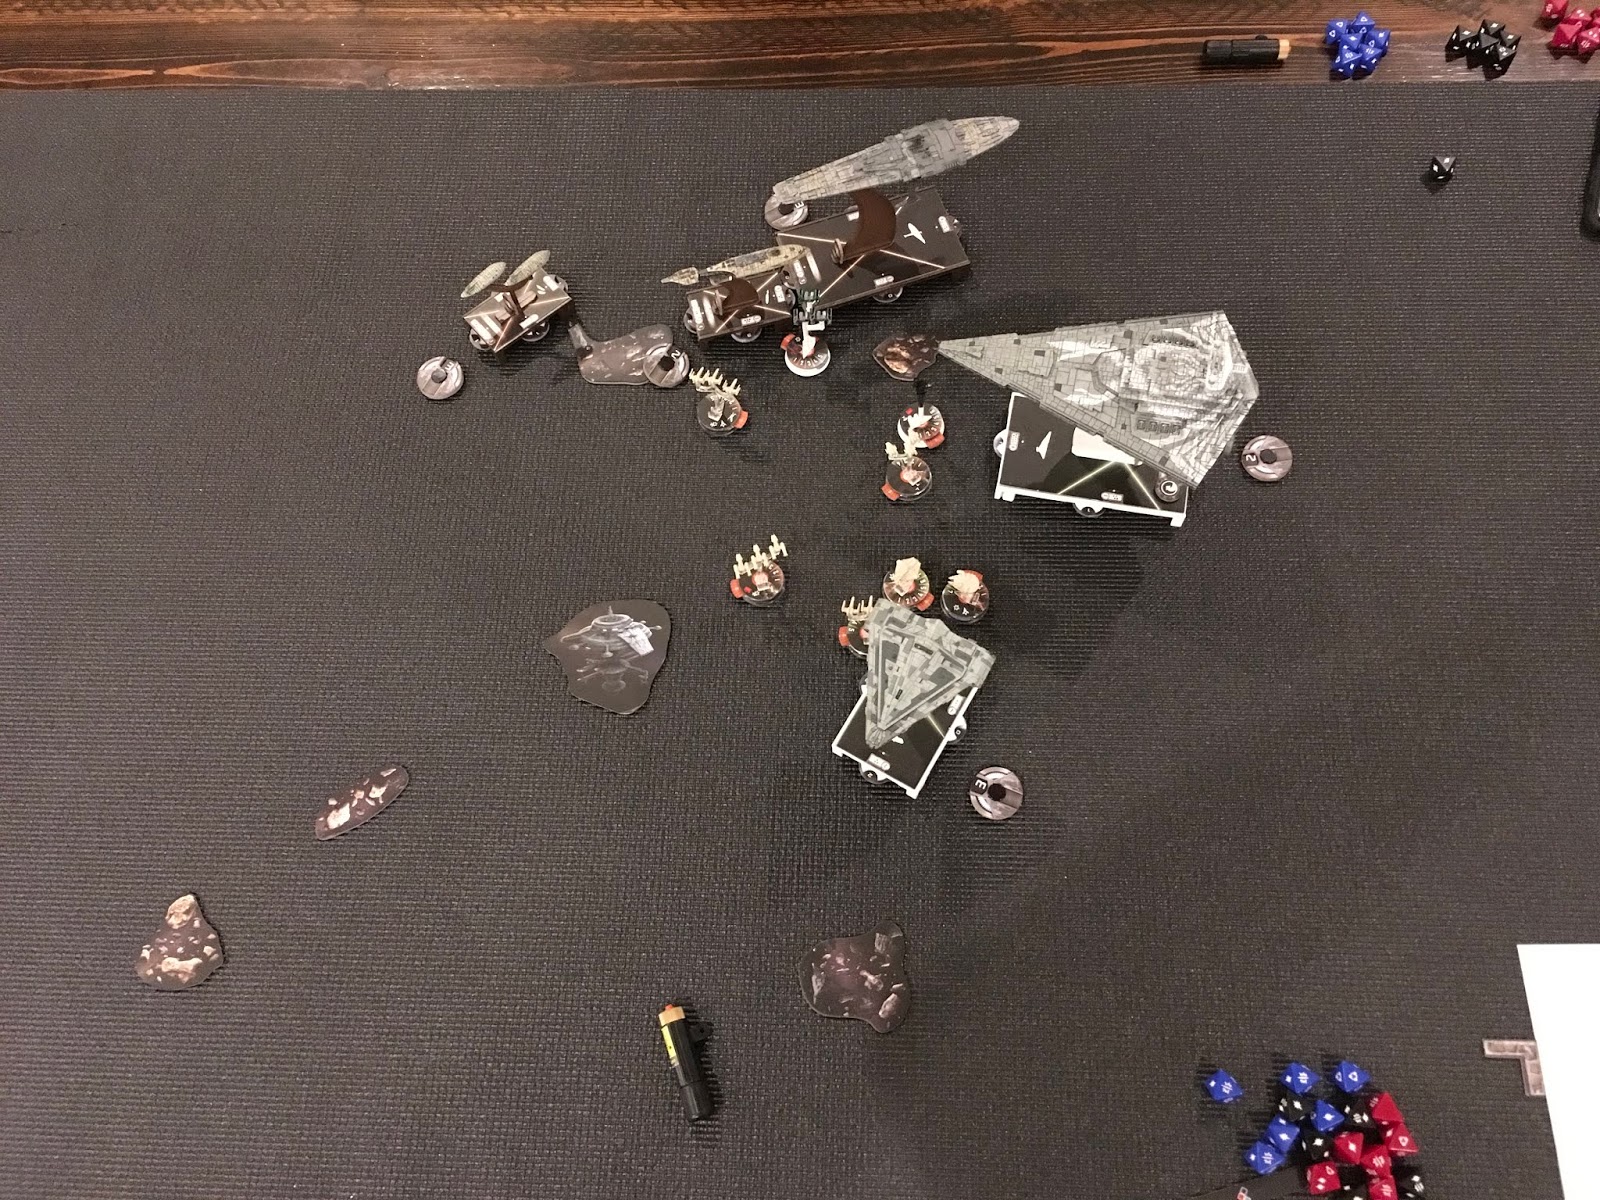
In the second turn, Andy slow-rolled his Kuat up and I moved to intercept the Quasar with the MC75 while keeping Admonition sheltered on the flank. Andy’s squadrons hit the MC75 hard, but it held together. He also moved Mauler over to hit Hera-Dutch-Wedge. I had placed Tycho in the path of his Quasar and ISD at the opening of the round and this forced Andy to use his Jumpmaster to free up some squadrons, as a result, I was able to then reposition Tycho after the Quasar move/overlap to tie up his two bombers which had not activated. He then activated them and moved them away from Tycho. My squadrons jumped in and did some work after disposing of Mauler. Here is the opening of turn 3:

In the third turn, Andy activated his Quasar first and hit the MC75 again. Because of my positioning of Rogue Squadron on one side and Dutch etc. on the other, he wasn’t able to free everything up to hit the 75, but he did some good damage and managed to bring it down to something like 2 hull remaining. In retaliation, the 75 hit the Quasar with 7 black dice and a red for 13 total damage (wow). With Wide Area Barrage, I was able to put 4 damage into Maarek Steele. The Kuat wasn’t able to finish the 75 either and Admo put some APT damage into the Kuat. I forgot to Intel Officer the brace here. My squadrons were able to clean up most of his (minus Jonus and Jendon). Here is the opening of turn 4:
In the fourth turn, my MC75 finally went down and I began to put some pretty significant damage into the ISD with my MC30. I finished off Jonus and chased the Quasar with Hera, Han, and Dutch, hoping to get the last bit of damage into it. Here is the opening of turn 5:

In the fifth turn, the Kuat attempted to make an escape, but ended up in the double arc at long range of the MC30, which finally got to use its spinal armament (that upgrade wasn’t really worth it). Combined with a CF dial, I was able to finish off the Kuat. The Quasar repaired a bit and managed to make an escape from my squadrons. We called the game at that point. Victory for Sato.
On my side, I really liked Wide Area Barrage, which I had never used before. I only got to shoot once with the MC75, but it soaked up substantial firepower over the course of rounds 2 and 3, which allowed my squadrons to eliminate his and to even do a little bombing themselves. The four points of brace/scatter-proof damage was sweet and could have eliminated a flotilla. Still, my squadron presence was strong enough that I didn’t need the help there and would have been better served with ACMs on both combat ships. Hera-Dutch-Wedge is a great combo and can really clean up opposing squadrons if they are left free to rampage. They also contribute an extra 3.25 average damage to ships in a pinch. I would have liked a little heavier anti-ship squadron presence, but I’m at a loss for how to do that without greatly degrading the anti-squadron side. This is where Imperials really shine with their Morna-Maarek-Jendon combo -- a fantastically flexible squadron presence that only requires a Gozanti for support.
On the other side of the board, Andy had a very formidable squadron alpha-strike, but struggled to get the BTA Kuat into play at the right time. He sacrificed his squadrons to try to take down the MC75, but couldn’t do a solid kill-shot on my remaining ship with his Kuat. I think having Pryce on the Kuat instead of the Quasar would help immensely to bring the heavy guns to bear. It would require an earlier alpha-strike with the Quasar, which would open his fighters up to flak and squadron counter-attack, but it might be the right trade-off. Alternatively, a longer threat-range from the heavy guns in the form of an ISD2 or Cymoon variant might help with that activation disadvantage.
I anticipate Sato being a very fun commander in the new Sector Fleet rules with larger point caps, though he still has Ackbar to contend with.
No comments:
Post a Comment
Note: Only a member of this blog may post a comment.