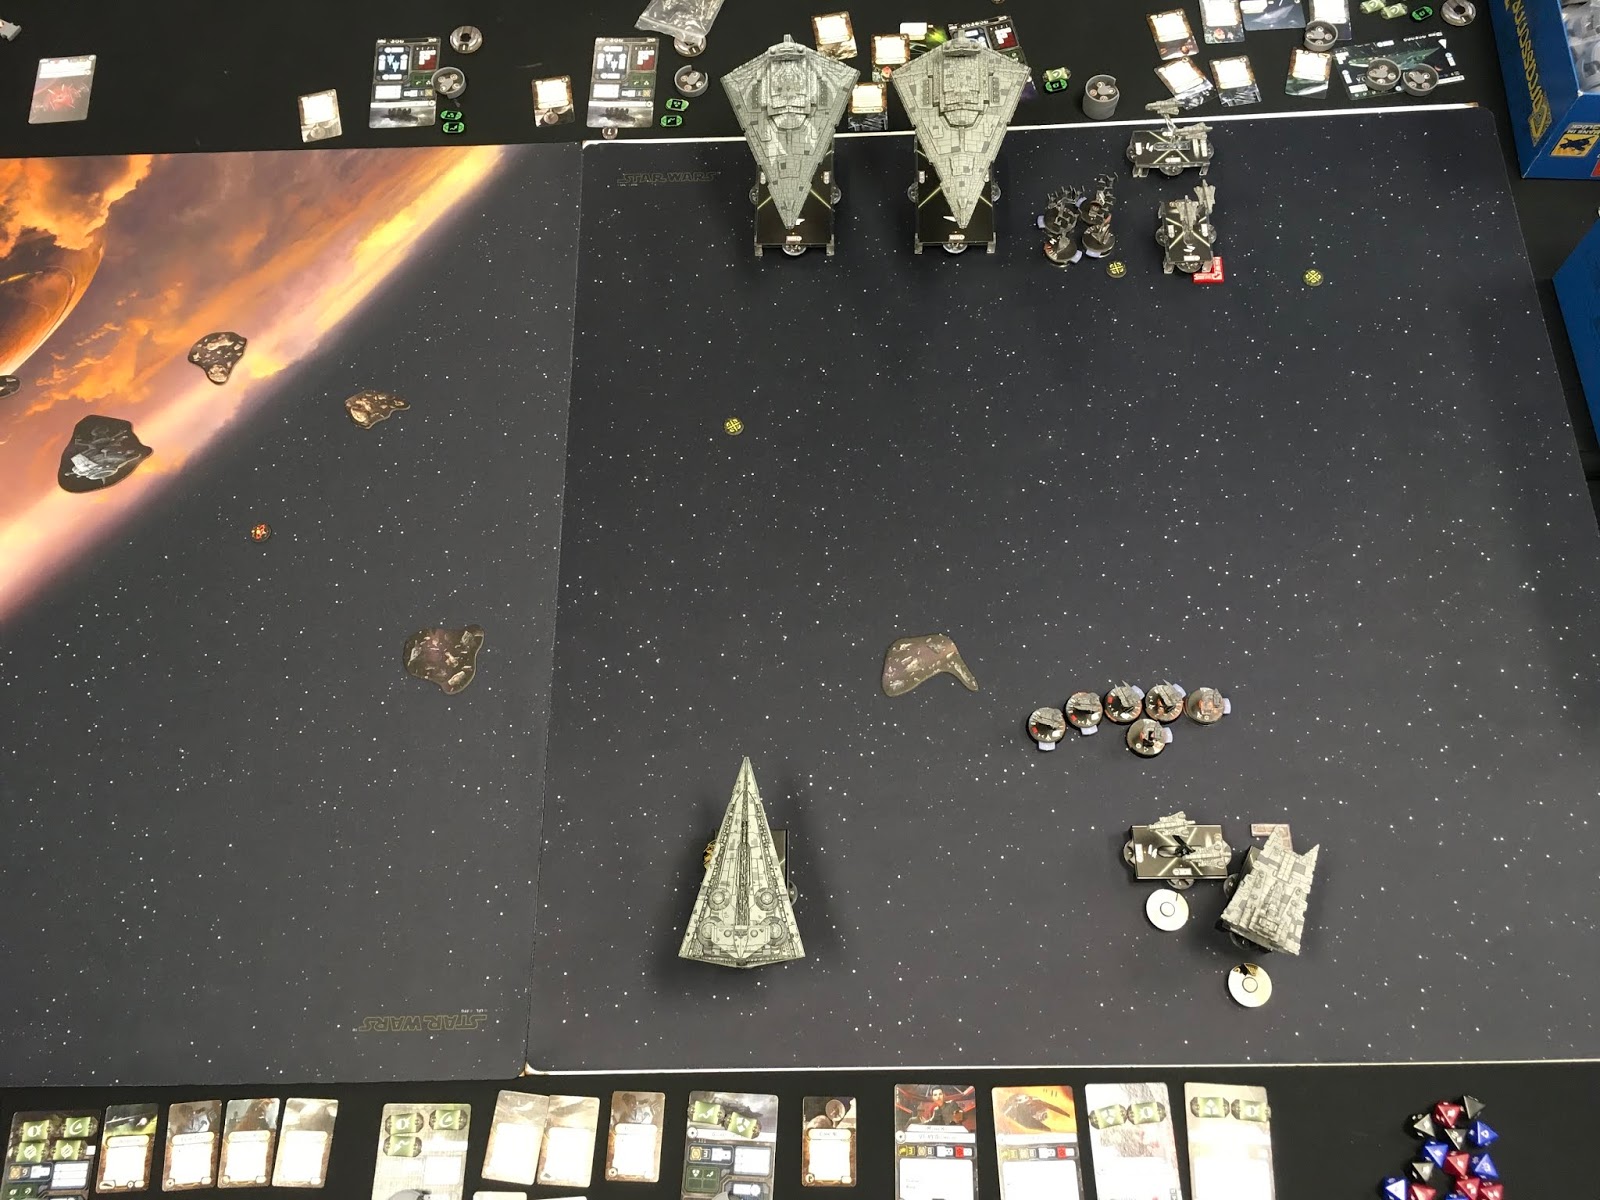
I played against Tyler this game. It was just a casual game. I brought Thrawn on a Victory with Harrow, ETs, Tua/ECM, OE, ExRacks, and LTT; Demo with Kallus, OE, ExRacks, and ETs; Comms Net Gozanti; and my recent favorite squadron ball consisting of Tel, Dengar, Morna, and 3 Decimators. On the other side, Tyler brought a Raddus list consisting of a pair of Hammerheads with ExRacks; an MC75 Ordnance Cruiser with ECM, APTs, OE, and ExRacks; a Toryn Farr GR75; a GR75 with Boosted Comms, Adar, and BCC; and a squadron ball of Lando, Dash, Wedge, Dutch, Gold, and a generic X-Wing. I had the bid, took first, and selected Superior Positions. Here is the opening of round 1:
In the first round, I collected tokens and we started in early on the squadron fight when Tyler put Dutch within my reach. Here is the opening of round 2:
In the second round, I jumped Demo up to throw some flak at the squadrons. I even burned my External Racks to try to knock out Dutch before he could activate. Alas, he survived the shot and was able to activate. He and Wedge teamed up to kill Tel Trevura. I used Engine Techs on both Demo and the Victory not because I needed to, but just because I could this was an error as I pushed Harrow up too far and blocked myself in with Demo’s presence. Tyler dropped Raddus in with a solid double arc on Harrow’s rear. Here is the opening of round 3:
In the third round, I activated Demo first and cleaned up Lando and Dutch while putting damage on the Hammerhead. Had I saved the ExRacks for said Hammerhead, I likely would have killed it. Aspiration activated and was able to kill Harrow with the double arc. I used ECM on the first shot, hoping that an accuracy would not be forthcoming in the second. Alas, Harrow died without contributing to the fight. I finished Dash in the squadron phase, but not before I finished off one of my Decimators with a perfect 4 damage roll. Here is the opening of round 4:
In the fourth round, I committed two of my Decimators to chasing down the Hammerhead, who only had a single hull remaining. Here is the opening of round 5:
In the fifth round, Demo put more damage on Aspiration and my Decimators at the bottom scored a single hit between the two of them, which Tyler was able to redirect. Here is the opening of round 6:
In the sixth round, my Decimators once again only scored a single hit between the two of them and the Hammerhead escaped giving Tyler the victory. Good game. It really went south on me with the Raddus drop, but I managed to hold on and scape up a good amount of points between the squadrons and the tokens. My Decimators failed me terribly, but that is part of the risk of bringing them. Harrow could have done well, had I played it properly, but I really blundered into that position right behind my other ship. Lesson learned: Don’t block yourself in, especially with an upcoming Raddus drop!
Sunday, November 10, 2019
Wednesday, November 6, 2019
2019 VASSAL Autumn Tourney Round 4 vs Rikash
In game four of the Autumn Tourney, I was paired with Rikash, who was running a very interesting list: a Command-Type SSD with Jerjerrod, DCO, Woldar, Wing Commander, Flight Controllers, LS, QBT, and the Reserve Hangar Deck. His squadrons were Valen, Rhymer, an Interceptor, a Jumpmaster, and 4 Firesprays. Looking at the overall concept, the lists are quite similar: a big, heavy activation with a bunch of Rogue bombers. I like his style. I had bid and took first and picked fighter ambush. This meant it was my game to lose. Here is the opening of round 1:
In the first round, I saved the Raider for last. I then jumped up to speed 4 in order to double-arc the SSD while threatening any squadrons that elect to stick around in the vicinity. This let me do some bombing with the Decimators to start softening the SSD. It is also my key mistake in this game as it forced me to activate the Raider first, come what may. Here is the opening of round 2:
In the second round, my Raider managed a total of two damage to the front of the SSD and then flew off. I was just inside medium range after the maneuver. Rikash was then free to alpha-strike my squadrons. He rolled nearly perfectly, even before the Woldar rerolls and cleared out Tel, Dengar, and a Decimator. The Raider was also hurting and he JJ-turned to ram it and remain on the station. My ISD then activated with a now useless squadron command. Here is the opening of round 3:
In the third round, I did what should have been done in the second. I activated my ISD and cleared out all of the Firesprays with my remaining Decimators. I lost another Decimator and Morna was hurting by the end of the round. Also, the Raider went down. Here is the opening of round 4:
In the fourth round, I was hoping for a Nav command, but had set a repair. I was unable to clear the SSD without an extra click along the way. This meant we were nose to nose. I had ECM and had removed the SSD Leading Shots with my Vader boarding team, but without a double-arc, I just wasn’t making much progress. Here is the opening of round 5:
In the fifth round, I yet again did not have that Nav command and was still stuck nose to nose. Rikash was only too happy to remain on the station and ram me. The sixth round brought the same and I was just shy of dropping the SSD to half health. Neither of us scored any victory tokens. Rikash was able to walk away with a very respectable 8-3 win.
I’m convinced that had I played the Raider conservatively on turn 1, I would have been able to gain supremacy in the bloody squadron fight. I had the right commands dialed in on my ISD for the first three rounds. This would have kept the Raider in reserve instead of wasting it on a marginal-value attack run. Rikash rolled extremely well on his alpha-strike, but had I hit first, it would have made a big difference in the results.
A final thought on Ozzel: had I taken Jerjerrod instead of Ozzel, three of my four games would have had more favorable results. I really wanted to like Ozzel, but I will be retiring him as a highly inferior admiral. For 3 more points, Jerjerrod is real steal.
On the other side, Rikash played it perfectly. He sat on the station and let his squadrons do their thing. He also rightly avoided my Raider on turn 1, letting the SSD take some Decimator hits and not taking the bait. Great game!
In the first round, I saved the Raider for last. I then jumped up to speed 4 in order to double-arc the SSD while threatening any squadrons that elect to stick around in the vicinity. This let me do some bombing with the Decimators to start softening the SSD. It is also my key mistake in this game as it forced me to activate the Raider first, come what may. Here is the opening of round 2:
In the second round, my Raider managed a total of two damage to the front of the SSD and then flew off. I was just inside medium range after the maneuver. Rikash was then free to alpha-strike my squadrons. He rolled nearly perfectly, even before the Woldar rerolls and cleared out Tel, Dengar, and a Decimator. The Raider was also hurting and he JJ-turned to ram it and remain on the station. My ISD then activated with a now useless squadron command. Here is the opening of round 3:
In the third round, I did what should have been done in the second. I activated my ISD and cleared out all of the Firesprays with my remaining Decimators. I lost another Decimator and Morna was hurting by the end of the round. Also, the Raider went down. Here is the opening of round 4:
In the fourth round, I was hoping for a Nav command, but had set a repair. I was unable to clear the SSD without an extra click along the way. This meant we were nose to nose. I had ECM and had removed the SSD Leading Shots with my Vader boarding team, but without a double-arc, I just wasn’t making much progress. Here is the opening of round 5:
In the fifth round, I yet again did not have that Nav command and was still stuck nose to nose. Rikash was only too happy to remain on the station and ram me. The sixth round brought the same and I was just shy of dropping the SSD to half health. Neither of us scored any victory tokens. Rikash was able to walk away with a very respectable 8-3 win.
I’m convinced that had I played the Raider conservatively on turn 1, I would have been able to gain supremacy in the bloody squadron fight. I had the right commands dialed in on my ISD for the first three rounds. This would have kept the Raider in reserve instead of wasting it on a marginal-value attack run. Rikash rolled extremely well on his alpha-strike, but had I hit first, it would have made a big difference in the results.
A final thought on Ozzel: had I taken Jerjerrod instead of Ozzel, three of my four games would have had more favorable results. I really wanted to like Ozzel, but I will be retiring him as a highly inferior admiral. For 3 more points, Jerjerrod is real steal.
On the other side, Rikash played it perfectly. He sat on the station and let his squadrons do their thing. He also rightly avoided my Raider on turn 1, letting the SSD take some Decimator hits and not taking the bait. Great game!
Tuesday, November 5, 2019
Ozzel LMSU vs Ackbar MC80
I brought an Ozzel ISD2, TRC Arquittens, HIE Raider (on left), Corvus/Iden Vader-Raider, and a Comms Net Gozanti. On the other side, Andy brought an Ackbar MC80 with Home One title, a pair of TRC90s with Intel Officers, Comms Net GR75, and a squadron ball consisting of a pair of YT2400s, Green Squadron, and a VCX. He had no bid, so I took first and selected his Intel Sweep. Here is the setup:
In the first round, I positioned my Arquittens to collect a token and move for a second. I probably should have seen the futility of that. I waited until the last to move the HIE Raider in for a long-range double-arc on the MC80. Here is the opening of round 2:
In the second round, I stripped a bunch of shields from the MC80 with my HIE Raider, but didn’t have a great place to fly after that to avoid shots, so ended up losing it to the combined fire of Andy’s whole list. I pushed Corvus up to act as a blocker. Here is the opening of round 3:
In the third round, I had to activate Corvus first to avoid getting popped by the Home One side arc. Everything clustered in around the MC80, which was down to just a few hull and a couple shields remaining. Here is the opening of round 4:
In the fourth round, I activated Corvus first, totally forgot about my external racks (that’s what I get for not using cards), and failed to score the requisite two hull damage on the MC80 to finish it off. I lost both the Raider and the Arquittens. I made the mistake of activating the ISD (finishing off both the MC80 and the left CR90) before my Gozanti, which let Andy position his last CR90 in my side arc. Here is the opening of round 5:
In the end, the CR90 escaped with a single hull and Andy obtained a close victory. It was a bloody game with some pretty significant mistakes on my part. I made a poor call on activation order in the fourth round. I also was so eager to get an early HIE shot on the MC80, that I failed to provision and plan for follow up shots. I essentially fed my small ships in one per turn. My concern for picking up tokens with the Arquittens made me place it in a highly vulnerable spot. I should have turn to the right in the first turn and planned to move to the front of the line, staying out of range of both CR90s when possible. This was a really great trial of a fleet archetype that I rarely utilize.
In the first round, I positioned my Arquittens to collect a token and move for a second. I probably should have seen the futility of that. I waited until the last to move the HIE Raider in for a long-range double-arc on the MC80. Here is the opening of round 2:
In the second round, I stripped a bunch of shields from the MC80 with my HIE Raider, but didn’t have a great place to fly after that to avoid shots, so ended up losing it to the combined fire of Andy’s whole list. I pushed Corvus up to act as a blocker. Here is the opening of round 3:
In the third round, I had to activate Corvus first to avoid getting popped by the Home One side arc. Everything clustered in around the MC80, which was down to just a few hull and a couple shields remaining. Here is the opening of round 4:
In the fourth round, I activated Corvus first, totally forgot about my external racks (that’s what I get for not using cards), and failed to score the requisite two hull damage on the MC80 to finish it off. I lost both the Raider and the Arquittens. I made the mistake of activating the ISD (finishing off both the MC80 and the left CR90) before my Gozanti, which let Andy position his last CR90 in my side arc. Here is the opening of round 5:
In the end, the CR90 escaped with a single hull and Andy obtained a close victory. It was a bloody game with some pretty significant mistakes on my part. I made a poor call on activation order in the fourth round. I also was so eager to get an early HIE shot on the MC80, that I failed to provision and plan for follow up shots. I essentially fed my small ships in one per turn. My concern for picking up tokens with the Arquittens made me place it in a highly vulnerable spot. I should have turn to the right in the first turn and planned to move to the front of the line, staying out of range of both CR90s when possible. This was a really great trial of a fleet archetype that I rarely utilize.
Thursday, October 31, 2019
2019 VASSAL Autumn Tourney Round 3 vs Order66 Beta
In Round 3 of the Vassal Tourney I was paired against Order66 Beta who was running a Piett ISD2, Glad2 Demo, Corvus Raider, Comms Net Gozanti, Mauler, Valen, Jonus, and a generic TIE bomber. I had the bid, picked first, and selected his Hyperspace Assault. Here is the opening of the first round:
The first round was the Pryce round. I held back with my ISD in the hope that he would drop Demo before I engaged his ISD. Alas, no such luck. My Decimators took the central area of the projected combat zone. Here is the opening of round 2:
In the second round, I jumped up to speed three to start getting some work done. Tel was able to tie up both Mauler and Valen, which left my Decimators free reign to start laying into the ISD. Here is the opening of round 3 after Demo dropped in from Hyperspace:
In the third round, I activated my ISD first with a squad dial to further soften the opposing ISD with my Decimators. This was a mistake as it left them unable to respond to developments later in the round. I was able to strip the Demolisher title with my BT Vader, which was pretty sweet. I also made a massive mistake by positioning my ISD head-on with the opposing ISD, cutting off my own escape later on. Here is the opening of round 4:
In the fourth round, I activated my ISD first, but didn’t have another squadron command to help me burn down the ISD or even a Nav to help me escape my predicament. Instead I had a repair. Not good. I was able to tank the ISD shot without issue, but had to use my ECM. I was stuck in the double arc of the Gladiator and the absence of the Demo title meant nothing. It was able to finish off my ISD. My Decimators put some damage on the Gladiator and finished off the ISD. I was just out of close range of the Gladiator with my Raider. Here is the opening of round 5:
In the fifth round, I activated my Gozanti first and finished off Demo with a pair of Decimators. My remaining two Decimators softened the Raider in the squad phase. The sixth round repeated that technique and my Decimators were able to destroy the Raider before it activated. Here is the final board state:
It was well played by Order66. He was at a very significant disadvantage, but he managed to make the most of it and score a kill on my ISD, holding me at an 8-3. The use of Vader against Demo upon exiting hyperspace was really solid, but I failed to capitalize on it. I’m still kicking myself for not planning an escape route for my ISD. I was more concerned about getting out of close range of Demolisher rather than focusing on long-term survival. Iden once again did great work on my Raider. It kept the opposing Raider from procuring any APT hits. My fighter wing did admirable work with Tel Trevura holding Mauler and Valen at bay.
The first round was the Pryce round. I held back with my ISD in the hope that he would drop Demo before I engaged his ISD. Alas, no such luck. My Decimators took the central area of the projected combat zone. Here is the opening of round 2:
In the second round, I jumped up to speed three to start getting some work done. Tel was able to tie up both Mauler and Valen, which left my Decimators free reign to start laying into the ISD. Here is the opening of round 3 after Demo dropped in from Hyperspace:
In the third round, I activated my ISD first with a squad dial to further soften the opposing ISD with my Decimators. This was a mistake as it left them unable to respond to developments later in the round. I was able to strip the Demolisher title with my BT Vader, which was pretty sweet. I also made a massive mistake by positioning my ISD head-on with the opposing ISD, cutting off my own escape later on. Here is the opening of round 4:
In the fourth round, I activated my ISD first, but didn’t have another squadron command to help me burn down the ISD or even a Nav to help me escape my predicament. Instead I had a repair. Not good. I was able to tank the ISD shot without issue, but had to use my ECM. I was stuck in the double arc of the Gladiator and the absence of the Demo title meant nothing. It was able to finish off my ISD. My Decimators put some damage on the Gladiator and finished off the ISD. I was just out of close range of the Gladiator with my Raider. Here is the opening of round 5:
In the fifth round, I activated my Gozanti first and finished off Demo with a pair of Decimators. My remaining two Decimators softened the Raider in the squad phase. The sixth round repeated that technique and my Decimators were able to destroy the Raider before it activated. Here is the final board state:
It was well played by Order66. He was at a very significant disadvantage, but he managed to make the most of it and score a kill on my ISD, holding me at an 8-3. The use of Vader against Demo upon exiting hyperspace was really solid, but I failed to capitalize on it. I’m still kicking myself for not planning an escape route for my ISD. I was more concerned about getting out of close range of Demolisher rather than focusing on long-term survival. Iden once again did great work on my Raider. It kept the opposing Raider from procuring any APT hits. My fighter wing did admirable work with Tel Trevura holding Mauler and Valen at bay.
Wednesday, October 30, 2019
JJ SSD vs Ackbar Defiance
For this match, I thought I’d try out the SSD. I was running the Assault variant with Jerjerrod, Annihilator, DCO, Kallus, Intel Officer, HIE, LS, QBT, LTT, QLT, and Gunnery Teams. In support, I had a Raider with Corvus, Iden, ExRacks, and OEs. Andy brought an Ackbar Defiance with a pair of TRC90s, Comms Net flotilla, Shara/Tycho, a HWK, and a VCX. I took first and picked Planetary Ion Cannon. Here is the opening of round 1:
First round, Andy turned a CR90 inward to get it in range for shooting. The other drifted just into range of the SSD as well. Here is the opening of round 2:
In the second round, I scored a solid hit on the right hand CR90 and a minor hit on the left hand corvette. I then took the full firepower of the opposing fleet that stripped most of my frontal shields. The heavily damaged CR90 moved out of range while the other one was stuck just moving out of the more dangerous front arc. Here is the opening of round 3:
Round three, the Raider killed the GR75. The Raider then went down to a double ram from the MC80, which also landed on the debris field and stripped the far shields. The CR90 survived a side arc shot from the SSD and flew off into the rear arc. Here is the opening of round 4:
In the fourth round, I used JJ to turn into the MC80, which was now shieldless and down to four hull. It had saved its brace all along for the next shot. Here is the opening of round 5:
In the fifth round, I was able to kill the MC80, finishing it off with a ram. The CR90s turned in to try for the kill as I only had 5 or so hull remaining. Here is the opening of round 6:
In the sixth round, I was able to kill both CR90s before they could shoot. Had Andy disengaged with the CR90s, it would have been a fairly close game as he had scored half points on the SSD quite handily. But, given that this was a casual game, he figured he might as well go all in.
Jerjerrod performed wonderfully as my admiral. I had a Nav command on the first turn to adjust speed and give me a token for later use. The rest of the game, I simply had repair commands dialed up. My Linked Turbolaser Towers also performed beyond expectations. I forced the HWK to flee after a single long-ranged LTT shot dropped it to a single hull. I was able to bring the VCX down fairly quickly too. On the anti-ship side, it generally provided all I needed for rerolls. I believe I only had to use leading shots once. Planetary Ion Cannons ended up being a fairly benign choice, though they did hurt the Raider a bit.
First round, Andy turned a CR90 inward to get it in range for shooting. The other drifted just into range of the SSD as well. Here is the opening of round 2:
In the second round, I scored a solid hit on the right hand CR90 and a minor hit on the left hand corvette. I then took the full firepower of the opposing fleet that stripped most of my frontal shields. The heavily damaged CR90 moved out of range while the other one was stuck just moving out of the more dangerous front arc. Here is the opening of round 3:
Round three, the Raider killed the GR75. The Raider then went down to a double ram from the MC80, which also landed on the debris field and stripped the far shields. The CR90 survived a side arc shot from the SSD and flew off into the rear arc. Here is the opening of round 4:
In the fourth round, I used JJ to turn into the MC80, which was now shieldless and down to four hull. It had saved its brace all along for the next shot. Here is the opening of round 5:
In the fifth round, I was able to kill the MC80, finishing it off with a ram. The CR90s turned in to try for the kill as I only had 5 or so hull remaining. Here is the opening of round 6:
In the sixth round, I was able to kill both CR90s before they could shoot. Had Andy disengaged with the CR90s, it would have been a fairly close game as he had scored half points on the SSD quite handily. But, given that this was a casual game, he figured he might as well go all in.
Jerjerrod performed wonderfully as my admiral. I had a Nav command on the first turn to adjust speed and give me a token for later use. The rest of the game, I simply had repair commands dialed up. My Linked Turbolaser Towers also performed beyond expectations. I forced the HWK to flee after a single long-ranged LTT shot dropped it to a single hull. I was able to bring the VCX down fairly quickly too. On the anti-ship side, it generally provided all I needed for rerolls. I believe I only had to use leading shots once. Planetary Ion Cannons ended up being a fairly benign choice, though they did hurt the Raider a bit.
Monday, October 28, 2019
Casual Tournament with Screed Dictor & Demo
I went to another casual tournament at Cool Stuff in Orlando this month. I have not used the Interdictor with the new objectives yet, and wanted an opportunity to give that a try. I brought a modification of my personal favorite list: A Screed Interdictor with title, Brunson, Targeting Scramblers, Grav Shift, HIE, ET, and DCaps; Demo with Iden, ET, OE, and ACM; a Comms Net Gozanti; and a squad ball of Dengar, Tel Trevura, Morna, and 3 Decimators. I picked three of the Gravity Rift objectives: Rift Assault, Rift Ambush, and Doomed Station.
In the first game, I was paired with Matt, who brought a Dual ISD Jerjerrod list consisting of an ISD2 (on my left), a Cymoon, a pair of Gozantis, and 4 generic TIE fighters. We tied for bid, rolled for it, I won, and picked his Fire Lanes. Here is the deployment (before I moved those obstacles):
Matt had a significant activation advantage, but my goal was to split the two ISDs by spreading Demo and Dictor on both flanks with my Decimators in the center. I also wanted to try to pick up some firing lane tokens. Here is the opening of round 2:
In the second round, Matt dropped is ISD2 to speed 0 to avoid a double arc HIE salvo from the Dictor. I accidentally moved Demo into long range of the Cymoon. The Cymoon used JJ to try to keep Demo in the front arc. My Decimators hit the Cymoon hard. Here is the opening of round 3:
In the third round, I maneuvered the Dictor out of the front arc of the ISD2 and tried to set up for a double-arc. I moved Demo to avoid another front arc shot. My Decimators continued the work on the Cymoon. Tel Trevura went down thanks to a multitude of accuracy results from the TIE fighters that prevented me from using up the defense tokens. Here is the opening of round 4:
In round 4, I moved Demo out of danger, which allowed the ISD2 to move into long range of the Dictor. The Cymoon was almost dead so I started in on the ISD2 with the Decimators, knowing that I’d activate Demo first on the following round to finish the Cymoon. Here is the opening of round 5:
In round five, I indeed finished the Cymoon and laid into the ISD2. I made a major mistake of having a repair command dialed up on Demo with no Nav Tokens while at speed 1. This meant that I couldn’t pull it out of danger and it was stuck in the front arc of the ISD2 with no shields. Demo went down, but I was able to line up a nice double arc with the Dictor for the following round. Here is the opening of round 6:
In the sixth round, the Dictor was able to bring the remaining ISD down to 2 hull remaining before finishing it off with a double ram. Thanks to the loss of Demo, the fire lane tokens, and the length of the game, Matt scored well. I think I end up with an 8-3 victory.
My next game was against Maxwell, who brought his JJ Assault-type SSD with Krennic, DCO, and loads of other upgrades. He had a squadron ball of Morna and a pair of Defenders. He had bid, took first, and picked my Rift Assault. I placed the rift in the middle with rocks flanking it. I deployed the Dictor and Demo to move around the rift and try to pull him into it. Here is the opening of round 1:
In the first round, I jumped the SSD with my Decimators. Tel Trevura tied up his squadrons. Here is the opening of round 2:
In the second round, Maxwell JJed his SSD toward my ships. My Decimators continued the good work. A Defender went down with Tel still going strong. Here is the opening of round 3:
In the third round, I managed to fly Demo over into the SSD rear flank arc, thinking I could easily take a single shot from that weak arc. The SSD was starting to take hull damage at this point. Here is the opening of round 4:
In the fourth round, Maxwell got a crazy good, essentially perfect, unmodified shot from his rear flank that was able to destroy my Demo. Eight damage with three accuracies was the result. He used Ravager to add a pair of black dice. I was just out of range of my Targeting Scramblers. Maxwell then moved onto the Gravity Rift in order to try to kill my Interdictor. His only hope was to table me on the following round as my Decimators were all still going strong. My Dictor got the double arc shot on him, rammed him, and then my Decimators finished the job, destroying the SSD before it could take the shot. Here is the final board state before removing the SSD:
In the end, I got second place despite my solid wins. My desire was two-fold: to try the gravity rift objectives paired with an Interdictor and to try to match my ECM-less fleet against the SSD to see how it fared. Both objectives were met and I was quite please with the results. Grav Shift in conjunction with the gravity rift really proved potent. I have noticed that the Rift Assault objective seems to be the weakest of the rift objectives. Something to keep in mind. Lastly, that Ravager title with the right upgrades and rolls can produce some absolutely devastating results. I won’t soon underestimate its damage output. Great games from both Matt and Maxwell though, and congrats to Tim for taking the win!
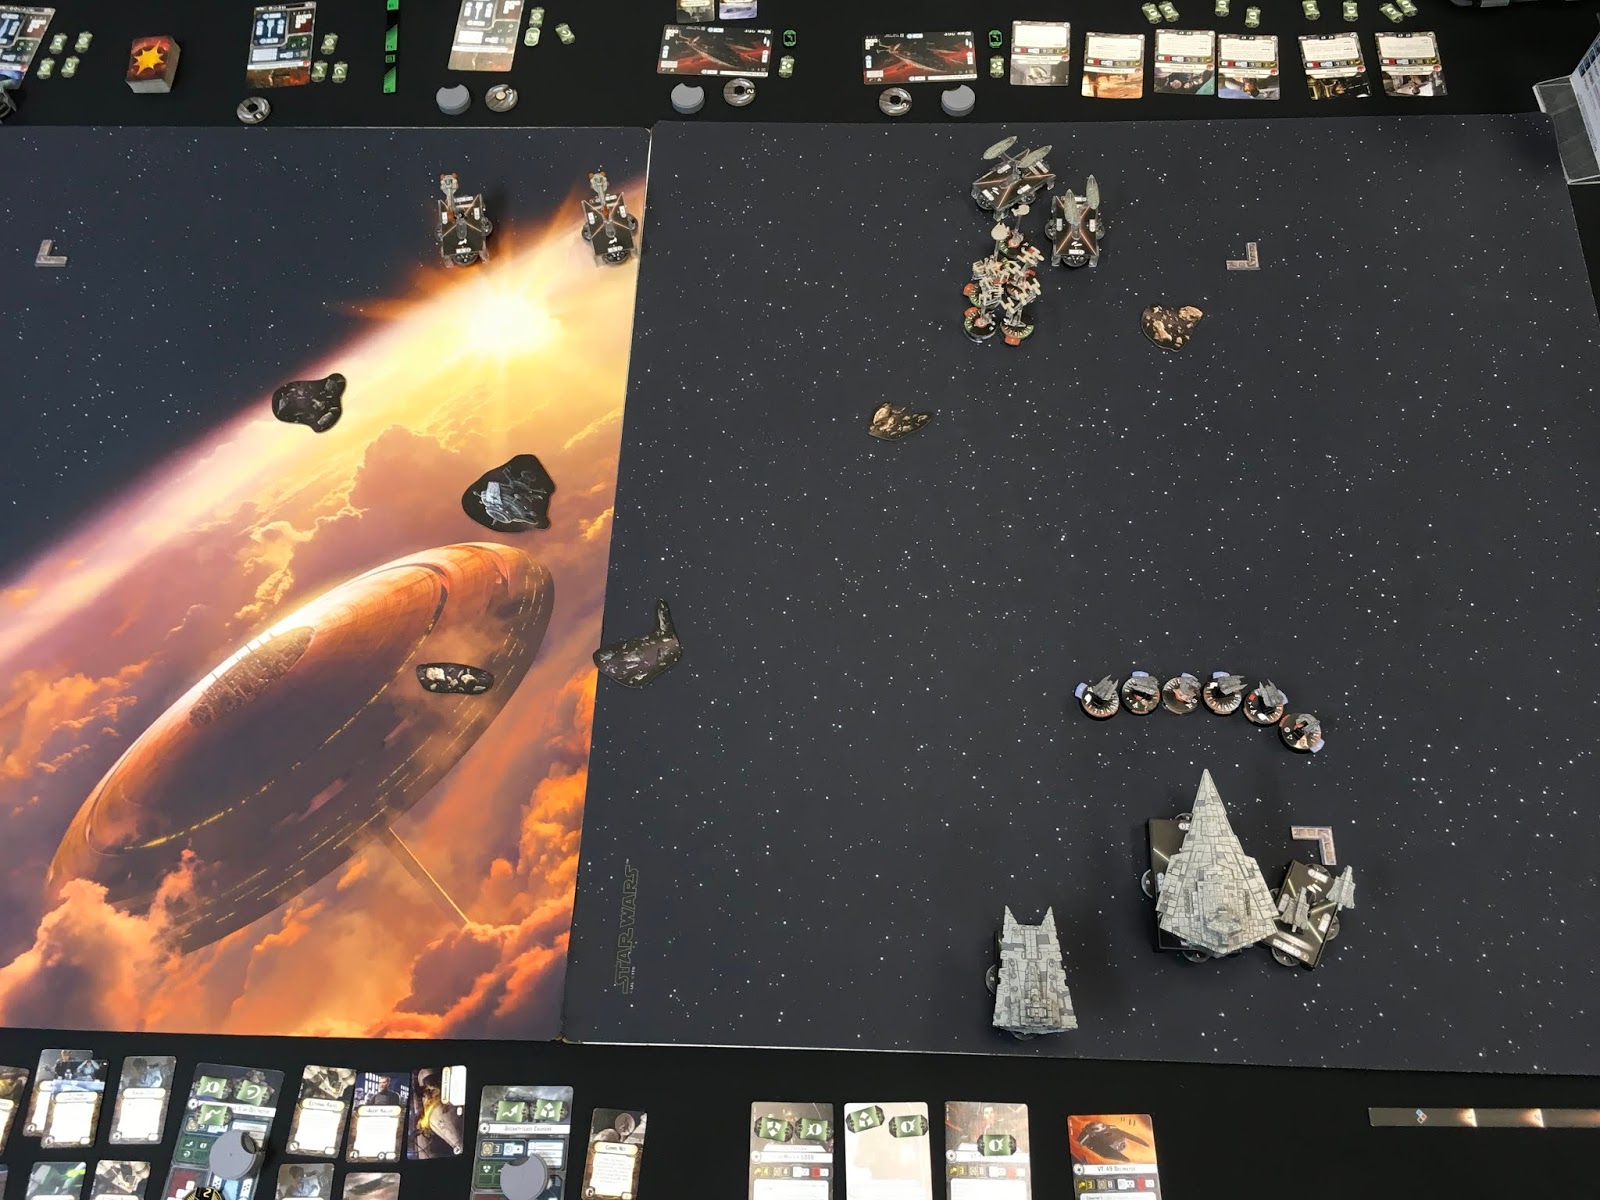
In the first game, I was paired with Matt, who brought a Dual ISD Jerjerrod list consisting of an ISD2 (on my left), a Cymoon, a pair of Gozantis, and 4 generic TIE fighters. We tied for bid, rolled for it, I won, and picked his Fire Lanes. Here is the deployment (before I moved those obstacles):
Matt had a significant activation advantage, but my goal was to split the two ISDs by spreading Demo and Dictor on both flanks with my Decimators in the center. I also wanted to try to pick up some firing lane tokens. Here is the opening of round 2:
In the second round, Matt dropped is ISD2 to speed 0 to avoid a double arc HIE salvo from the Dictor. I accidentally moved Demo into long range of the Cymoon. The Cymoon used JJ to try to keep Demo in the front arc. My Decimators hit the Cymoon hard. Here is the opening of round 3:
In the third round, I maneuvered the Dictor out of the front arc of the ISD2 and tried to set up for a double-arc. I moved Demo to avoid another front arc shot. My Decimators continued the work on the Cymoon. Tel Trevura went down thanks to a multitude of accuracy results from the TIE fighters that prevented me from using up the defense tokens. Here is the opening of round 4:
In round 4, I moved Demo out of danger, which allowed the ISD2 to move into long range of the Dictor. The Cymoon was almost dead so I started in on the ISD2 with the Decimators, knowing that I’d activate Demo first on the following round to finish the Cymoon. Here is the opening of round 5:
In round five, I indeed finished the Cymoon and laid into the ISD2. I made a major mistake of having a repair command dialed up on Demo with no Nav Tokens while at speed 1. This meant that I couldn’t pull it out of danger and it was stuck in the front arc of the ISD2 with no shields. Demo went down, but I was able to line up a nice double arc with the Dictor for the following round. Here is the opening of round 6:
In the sixth round, the Dictor was able to bring the remaining ISD down to 2 hull remaining before finishing it off with a double ram. Thanks to the loss of Demo, the fire lane tokens, and the length of the game, Matt scored well. I think I end up with an 8-3 victory.
My next game was against Maxwell, who brought his JJ Assault-type SSD with Krennic, DCO, and loads of other upgrades. He had a squadron ball of Morna and a pair of Defenders. He had bid, took first, and picked my Rift Assault. I placed the rift in the middle with rocks flanking it. I deployed the Dictor and Demo to move around the rift and try to pull him into it. Here is the opening of round 1:
In the first round, I jumped the SSD with my Decimators. Tel Trevura tied up his squadrons. Here is the opening of round 2:
In the second round, Maxwell JJed his SSD toward my ships. My Decimators continued the good work. A Defender went down with Tel still going strong. Here is the opening of round 3:
In the third round, I managed to fly Demo over into the SSD rear flank arc, thinking I could easily take a single shot from that weak arc. The SSD was starting to take hull damage at this point. Here is the opening of round 4:
In the fourth round, Maxwell got a crazy good, essentially perfect, unmodified shot from his rear flank that was able to destroy my Demo. Eight damage with three accuracies was the result. He used Ravager to add a pair of black dice. I was just out of range of my Targeting Scramblers. Maxwell then moved onto the Gravity Rift in order to try to kill my Interdictor. His only hope was to table me on the following round as my Decimators were all still going strong. My Dictor got the double arc shot on him, rammed him, and then my Decimators finished the job, destroying the SSD before it could take the shot. Here is the final board state before removing the SSD:
In the end, I got second place despite my solid wins. My desire was two-fold: to try the gravity rift objectives paired with an Interdictor and to try to match my ECM-less fleet against the SSD to see how it fared. Both objectives were met and I was quite please with the results. Grav Shift in conjunction with the gravity rift really proved potent. I have noticed that the Rift Assault objective seems to be the weakest of the rift objectives. Something to keep in mind. Lastly, that Ravager title with the right upgrades and rolls can produce some absolutely devastating results. I won’t soon underestimate its damage output. Great games from both Matt and Maxwell though, and congrats to Tim for taking the win!
Friday, October 25, 2019
Madine Mon Karren vs Thrawn ISD & Demo
I brought Mon Karren with Madine, Bail, ET, WBT, HIE, and LTT; an MC30 Scout with EST, TRC, ExRacks, and OE; slicer Storm with Ezra; a Comms Net flotilla; and squadron support consisting of Shara, Tycho, Dash, and Lando. On the other side, Andy brought a Thrawn list with an ISD2, standard Demo, BTVader Corvus, a Gozanti, and Ciena/Valen. I had a slightly higher bid and picked 2nd, despite being out-activated. Andy picked my Rift Assault and we were off to the races:
I kept Mon Karren back in the hope that Andy would get reckless with his Raider and I’d be able to kill it before the ISD entered the fray. Here is the opening of round 2:
In the second round, I was able to activate my Liberty after the ISD and Demo. I used my Engine Techs to position Mon Karren in front of the pair. I tried to get Demo into a double arc, but went a little too far and my front arc ended up being out. This made me split fire between Demo and the ISD on turn three. I was also just within range of the gravity rift, which meant that I only had an effective speed of 2+1. This resulted in the ISD getting a double arc on me. I totally misplayed that approach. Fortunately, Andy accidentally blocked his Demo in with the ISD, preventing him from giving chase right away. Here is the opening of round 4:
In the fourth round, the ISD stripped the shields from the MC30, but landed right on the gravity rift. I used Ezra to move the rift enough to remove obstruction for the MC30 shot. It was a good shot that brought him down to 3 hull. Lando was able to finish the job in the squad phase. Mon Karren was down to just a few hull as well. Here is the opening of round 5:
In the fifth round, Mon Karren indeed went down and Andy positioned Demo to finish off my MC30. Here is the opening of round 6:
In the sixth round, the tabling was completed, a disaster for the rebellion. The ISD was destroyed, but not due to great play on my side. Andy simply got too aggressive and couldn’t avoid the rift. Choosing Bail over strategic advisor ended up being a bad move. Similarly, me choosing second player in order to make proper use of Bail was a mistake given that I was out-activated. The Rift Assault objective ended up scoring Andy some points while I made no use of it. Only having two ships that can score points on it puts me at a distinct disadvantage. Good learning experience.
Subscribe to:
Posts (Atom)